Monday, January 31, 2011

It's A Snowpocalypse

We've had so much snow here in New Jersey that I had to scrap about it. It has snowed every week since the day after Christmas. I'm so sick of snow, I don't know what to do with myself. Our last snow storm left behind a hefty 19" on top of ton of snow already on the ground AND today it's sleeting and the promise of more snow is looming!!

Driving has become a nuisance, not just because of the icy roads, but all of the snow that has been plowed to the side of the road has drastically narrowed streets, sidewalks have all but disappeared causing pedestrians have to walk in street. When I pull up to an intersection, I'm darn near in the middle of the street before I can see around the snow banks. Don't even try to go to the store because the enormous mountains of snow all over the parking lot have reduced parking spaces by 1/3, making them a hot commodity. As soon as I get in your car to pull out of a space and I can't help but laugh at the parking space piranha that a swarming around me.

I guess my Cheery Lynn Designs dies will be getting quite a workout. With all of this snow on the ground the only thing a girl is left to do is scrap.

I used a couple of CLD's new dies, Wittle Weaver and Large Circle Pierce Plate, on this layout to help add some texture.

Here you can see the texture that the piercing plate adds to the scalloped circle. How cute is that pierced snowman? He was really easy to pierce together. I simply cut small scraps of paper and taped them to the section of the die that I wanted. This way, I only had to run the die through my Epic Six once.


I used the Wittle Weaver to cut strips from striped paper to bring all of the colors in my layout together. I love the deep set texture this die adds.

For a complete list of the dies used on this layout, check out this post Cheery Lynn Designs blog.

Thanks so much for stopping by the blog today. I hope you are warm in your part of the world! Have a scrappy day!


Sunday, January 30, 2011

52 Week Project - January Photos

One day last month, I saw that my girl, Sasha had 'liked' a link to a blog called the 52 Week Project on Facebook. She always finds the coolest stuff on the 'net, so I decided to check it out since I noticed it was photography related and knew it was something I'd be interested in.

Last year, I started Project 365, where you take a photo every day of the year. I failed miserably at it and probably took about 5 pictures before I gave up. I'm still interested in doing Project 365 as I've loved seeing other dedicated photographers' pictures...but I'm going to take smaller steps and build up to that.

The 52 Week project is a challenge blog dedicated to getting photographers of all levels to take a self portrait once a week for a year. This is right up my alley. For those of you who have followed my blog for a while know that my scrapping motto is to scrap yourself. I believe it's imperative to be included in our own family histories, which is why I make sure to get in front of the camera every now and again. I know for some, the thought of taking self portraits can be a nerve wracking experience, but Kim (author of the 52 week project blog) and the other participants make you feel at ease and have some great inspirational ideas, too!

I'll be sharing each of my photos here at the end of each month. I'm really excited about this challenge, so I hope I can stick it out all the way through...so far, so good.

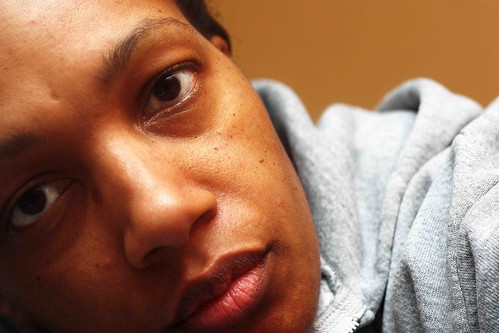
Week 1 photo: taken 1/2/11 feeling kind of blah

Week 1

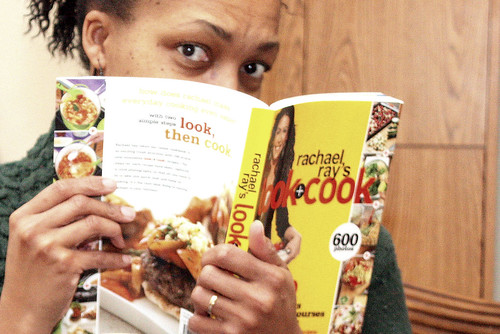
Week 2 photo: 1/15/11 I'm staying true to my one and only resolution--to cook healthier meals for my family. I am loving Rachael Ray's new cookbook! I've already made about 6 or 7 meals from it and they were yummy!

This photo came out blurry because I wasn't in front of the camera when focusing and I couldn't get it right, but for some strange reason, I like the look that the blurriness adds. I just wished my eyes were less blurry, but hey they can't all be perfect, right?!

Week 2

Week 3: taken 1/22/11 with my 50mm lens. I held the camera at arms length and snapped a couple of photos...I really like this one. I used Picassa to desaturate the photo until just before it completely turned black and white. You can still see the tones in my hat and a little color in my lips and my gold earring. I like how the light in my eye looks like 2 converging lines...almost like a road to my soul.


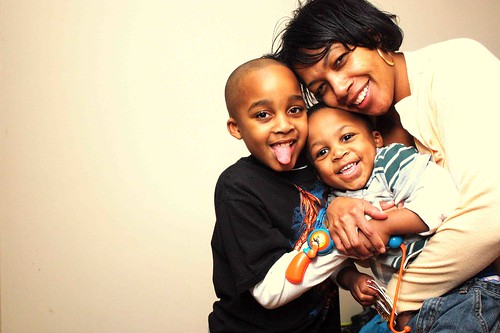
Week 4 photo taken 1/29/11 My boys and me on the day of Donovan's 7th birthday. I like how the shadows on my living room wall created sort of a vignette around us. I call this one Crazy Chaotic Love.

Donovan is my first born child. Every birthday that he celebrates is also a reminder of how long I've been a mother and in essence is an extra reason to celebrate!

I love these crazy boys to death!!
Crazy Chaotic Love Week 4

I think my weeks are a little off...but it's OK, I'll figure it out and get on the right schedule. I'm just happy that I stuck with it this month...baby steps...right...

Thanks so much for stopping by the blog today. I hope you've enjoyed getting a little peek into my world. Have a wonderful February!


Saturday, January 29, 2011

NEW Bella Blvd CHA Winter 2011

Man oh man do I have lots of goodies to share today!! If you've been glued to Bella Blvd's blog over the past week, then you know the new releases are out.of.this.world!! I am just over the moon that I got to play with a big box of Bella goodies! When I think of products that work well for boy pages, Bella Blvd is always at the top of my list.

So without further adieu....here are the projects that I created for Bella Blvd!!

Baby of the Family was created using Family Dynamix and features Mr. Xander. This line is filled with bright happy colors and can be used for many different topics.


Sweet Little Ones was created using the Sophisticates line which are beautiful monochromatic papers and chipboard embellies that coordinate with all of Bella Blvd's lines. How fab are those chipboard alpha?

The pictures are of Donovan and Xander and were taken nearly 7 years ago. I'm tearing up a little just looking at them, especially since today is Donovan's 7th birthday! They grow so fast!


& Puppy Dog Tails was created using Tail Waggers and Cat Naps and again, features my boys. This is Bella Blvd's pet line, but as you can see, it's not just for pets! I'm loving those adorable little puppies and that fantastic woodgrain paper!!

Mr. Trouble features my little trouble maker and was created using the ever so adorable Mr. Boy line. I love all of the new lines, but this one, I really love. All of the sayings are perfect for my 2 busy body little boys!


This card was also made with Mr. Boy. How cute are those dinosaurs? This collections is also filled with stars and rocketships...it doesn't get any more "boy" than that!

Life Is Good was also created with the Sophisticates line.


My final project is a mini album featuring my family of 4. All of the elements are from the Family Dynamix line.

back cover

Inside pages of the mini album

(chipboard album is from Buzz and Bloom)


Thanks so much for stopping by today! I hope you have enjoyed these projects as much as I enjoyed creating them!!

Thursday, January 27, 2011

NEW Creative Imaginations and New Petaloo

Craft and Hobby manufacturers are busy in sunny California setting up their booths and preparing to show off their new releases. I wish I could be there, we just got hit with another foot of snow here in NJ.

I've started posting some sneak peeks for the companies that I created projects for and will continue over the next few days.

Today, I'm sharing a layout and card that I created with one of Creative Imaginations' new releases designed by Samantha Walker called Heidi. The first thing I noticed when I opened my box and pulled out these beautiful papers was the versatile color pallet. I knew that I could easily use the red, orange, and yellow combination for any project about girls, or the blue, green, and yellow to highlight a project for boys!!

I used Heidi, along with CI's new gingham cardstock, some banana papers and corrugated cutables to create a Springy layout featuring my friend Dolores' little daughter. (The pennant banner and fence were cut using dies by Cheery Lynn Designs)


I used patterned paper and a sticker from this collection to create this baby boy card.


I'm also sharing an 8x8 layout and card created using the new brightly colored flowers and crocheted trim from Petaloo.

I used the flowers here to "hug" the photo of the boys and me. (I used lots of luminarte Radiant Rain shimmering spray to create the background and change the color of the lace trim)


I mixed one of Petaloo's existing products, Candies, with the new brighton flowers and crocheted trim to create this simple, elegant card.

I had a lot of fun working with all of these products! Stay tuned for more new releases!

Thanks for stopping by the blog today! Hope you have a scrappy day!!


Tuesday, January 25, 2011

Creative Imaginations New Release - Marrakesh

"Christine Adolph's new collection, Marrakesh blends warm, rich colors along with beautiful patterns. Look for Marrakesh in store this April!"

Check out these and other new releases from Creative Imaginations on the blog!

I am a huge proponent of scrappers including themselves in their own scrapbooks. The rich colors and gorgeous patterns in this collection had my name written all over it, so I just had to create a layout about me! I punched scalloped strips from the different purple papers found in this collection and layered them for a textured look that mimics my "new favorite dress". I added a bunch of Petaloo flowers and punched butterflies to finish off the layout.


The design of the layout inspired this card. I repeated the layered punched border strips to create a very mature looking birthday card.


I also used Marrakesh on this little purse mini album featuring my friend Dolores' little girl. I painted the handle and edges of the mini with egyptian gold luminarte.

See the button in the center of the flower? I made it with clay! Go me! I rolled the clay out and then pressed a dimensional button die from Cheery Lynn Designs, cut around it, poked out the holes and then let it dry. Once dry, I painted it with luminarte and then added it to my project.


I'll be posting lots more CHA projects in the next few days!!

Thanks for stopping by today!


Monday, January 24, 2011

New Dies

I am in love...not only with my sweet little Xander, but with Cheery Lynn Designs new doilie dies. So long plain ole white doilies, with these new dies, you can create doilies in limitless colors...and the details are AMAZING!!

I used the English and French doilies on my project, but there are 6 new doilie dies to choose from.

supplies: patterned paper, stickers, canvas border, metal badge, rub-ons, tickets- Pink Paislee; dies; Cheery Lynn Designs; ink- Clearsnap; cardstock- Worldwin; pen- sharpie


This card was created for gonescrapbooking/examiner.com, using Echo Park's new Be Mine collection.

supplies: patterned paper, sticker- Echo Park; cardstock- Bazzill; pearls- Want 2 Scrap; gem, flower- Petaloo


Saturday, January 22, 2011

Upcoming Classes

Two weeks from today, I will be teaching these 2 mini album classes at Croptopia Getaways Winter Event in Whippany, NJ.

Love U Tag Mini Album
Saturday, February 5th
9:30 am- 11:30 am


Family Mini Album
Saturday, February 5th
1:00pm- 3:00 pm


Wednesday, January 19, 2011

Finally Finished

Off to CHA they go!! My labors of love... 23 projects in total, all created this month. I am officially creatively brain dead!! If you're heading to CHA, you can check out what's inside these boxes at Bella Blvd, Cheery Lynn Designs, Creative Imaginations, and Petaloo.


Posted by Picasa

Saturday, January 15, 2011

MIA

Man have I been swamped this month. CHA is just 2 short weeks away and I am up to my neck in projects. I love this time of year because I get to see a lot of the new stuff before it hits the stores, but man am I feeling the pressure...not to mention the fact that my mojo is trying to abandon me but I'm hanging on for dear life! I'm not attending CHA this time around, but I will have lots of projects in Creative Imaginations, Cheery Lynn Designs, Petaloo, Bella Blvd's booths. I can't wait to share with you what I've created!! Fun stuff!

Additionally, I will be teaching 2 mini albums classes for Croptopia Getaways in Whippany, NJ next month. You can get more detailed info here.

Today, I took a break from creating to try and regroup. I do, however have a few projects to share.

I recently ordered Echo Park's new Be Mine collection and all I can say is WOW!!! It's truly gorgeous! I created the following 2 cards with the collection.

Always In My Heart was created for gonescrapbooking/examiner.com


Be-Leave In Love (I know it's a little cheesy) was created for Cheery Lynn Designs using the new dimensional leaves. Click here to see what the rest of the design team created with the new dies.


Finally, I created this frame a while ago for Petaloo. I turned a $1 wooden frame into a beautiful gift for a friend, using Mulberry flowers, glittered dazzlers, bees, and glitter paper for the background.


Ok, well it's time for me to climb in the bed. I'm beat!! See ya next post. For all of my scrappy peeps in the NJ area who are attending the Croptopia Getaways crop...hope to see you there!!!


Monday, January 10, 2011

Love You Gift Set

Just sharing my latest Cheery Lynn Designs project, an altered truffle box with matching card.


I started by covering a chocolate truffles box with patterned paper, cardstock, Petaloo flowers, and some of my favorite Cheery Lynn Designs die cuts.

Here are a few close-ups of the truffle box:


Next, I created the card and used Love Expressions sentiment, which I cut after embossing and 1/2" School Days Font. I added ribbon, more Petaloo flowers, and stickles and there you have it...a quick and easy gift set.


Thanks so much for stopping by the blog today!

Tuesday, January 4, 2011

Cheery Lynn Designs Projects & Giveaway

I combined a host of Cheery Lynn Designs Dies to create this super girly layout featuring a mix of October Afternoon papers. I used the dies with a variety of different materials: patterned paper, thin chipboard, and glittered cardstock.


I used the Butterflies Bundle dies to die cut butterflies from Core'dinations Core Couture cardstock. I really like the embossed effect.


Here, I created a faux scalloped border by die cutting the smallest circle from the XL Nested Circles pack, cutting them in half, and adhering them to the bottom of the striped paper.

I cut the smallest Coved Rectangle from thin chipboard and embossed using the Dots/Lines Metal Embossing Plate before adhering to the layout.

The Buttons were cut from thin chipboard and patterned paper and layered for a dimensional effect.


I also cut a portion of the Picket Fence out using both thin chipboard and patterned paper. I adhered the 2 together and then attached to the layout using pop dots.

I created a "sun" using the largest XL Nested Scallop Circle die. I added pen work and then adhered behind the photo for that pop factor.

The Pennant banner was cut from cardstock. I trimmed the center from one of the extra flags and used it to hand cut triangles to layer on top of the banner.

I die cut my title using lower case letters from the School Days 1/2" Font Set and then adhered each one to a flower that was hand cut from patterned paper, and attached to the banner.


I'm so happy I finally have a little girl to scrap; thanks to my friend Dolores for allowing me to use pictures of her cutie pie daughter! You're definitely going to see more girly layouts here in 2011!!

I also created this card using Love Expression Collection, Heart 2 Heart, XL French Flair Nested Dies and Petaloo hydrangeas and rose blooms. I inked the Love Expression embossing plate before sending it through my Epic Six to add color to the debossed words and then layered the rest of the elements for dimension.


Cheery Lynn Designs has a Blog Candy Giveaway going on right now. Go to the blog to check it out.

Thanks for stopping by today!!!


Blog Widget by LinkWithin

My photo
I live in New Jersey with my husband and our 2 sons. I work full time as a Medical Technologist and volunteer for the Community Emergency Response Team in my town. I've been scrapping for the past 8 years and I truly love it because it allows me to combine my love of photography and my love of paper into one art form. I love teaching scrapbook classes and providing freelance work. Please contact me via email if you are interested in commissioning my services: tanisharenee74@hotmail.com

All content, including text, photographs, and artwork are copyright 2011 by Tanisha R. Long (except where noted). My original artwork is shared for personal inspiration only, not for commercial use. This includes contests, submissions, and publications. Any other use requires my expressed written consent.
MyFreeCopyright.com Registered & Protected

My Favorite Projects

Twitter


FEEDJIT Live Traffic Feed

Blog Archive

Labels