It's that time of year when many of us go out to search for the perfect gifts to give to our friends and loved ones. Once you find that perfect gift, what better way to present it than in a stunning handmade gift bag?!
Happy Monday everyone!! I am so thrilled to present my first project as a member of
Cheery Lynn Designs DT to you today.
I created this gift bag using 2 different sets of nested dies:
French Flair and
Coved Rectangle
I started by using the largest
French Flair Die to cut 2 panels from Pink Paislee Father Christmas 6x6 paper pack with my Epic Six die cut machine. I inked the edges and then set aside.

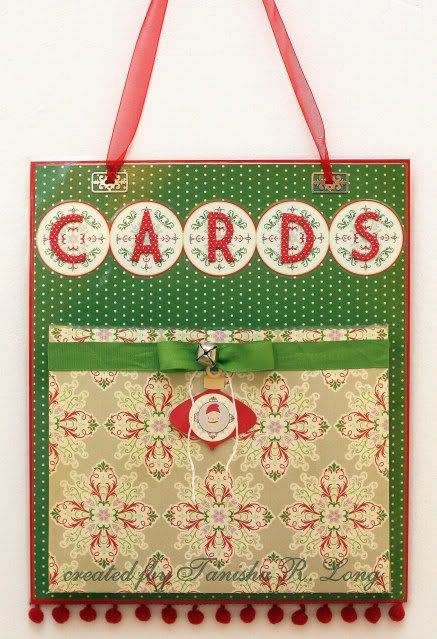
Next, I cut a 12"x 3 1/2" strip from patterned paper (Father Christmas) and scored 1/2" from the edges of the long ends and 4" from the shorter ends and then folded, as shown.
NOTE: I wanted this to be wide so I could fit a size present in it, but you can vary it to fit your needs. Just cut the strip 1" wider than you need because you're going to need to score 1/2" on each side to attach the panels.

I folded the strip, as shown and used Helmar Premium Craft glue on the corners. I used the paper clips just to hold it in position, once dried, I removed them.

I adhered the folded strip to one of the panels, a little closer to the bottom to leave room to punch holes at the top for the handles.

I adhered the second panel to the strip and ensured that the bag was straight before the glue dried completely.

Next, I die cut 2 panels using the 2nd and 3rd largest
Coved Rectangles. I inked the edges and then layered them using foam Zapdots for dimension. I matted the layered piece with a piece of inked red patterned paper and then adhered to the front of the gift bag about 1/2" from the right side.

Finally, I decorated the bag with
Petaloo Chantilly flowers and a Canterbury pick, a paperclip, pearls, and a die cut sentiment from Father Christmas. I punched holes in the top and used ribbon to create the handles.

Here's a close up of the front
.
 supplies: patterned paper, die cut- Pink Paislee; flowers- Petaloo; ink- Clearsnap; ribbon- Savvynsassy; dies- Cheery Lynn Designs;Pearls- Want 2 Scrap; adhesive- Helmar; paperclip
Thanks so much for stopping by the blog today. I hope this project has inspired you to make one of your own for any occasion! They are super easy and FUN! Be sure to check out
Cheery Lynn Designs blog everyday to see what our amazing DT is up to!!
Until next post...have a scrappy day!