Saturday, January 23, 2010

It's Time For Bella Blvd!!

As you read this post, I am on sensory overload taking in all of the yummy new scrap goodies at CHA in sunny California! I am so glad that the rain went away before I landed and the beautiful sun is shining. I am severely jet-lagged and can't sleep, but I am having a ball. Of course at the end of my trip, I'll probably be a delirious zombie by the time I arrive back in New Jersey.

I have been DYING to show you the last of my CHA projects. I was asked by the super sweet and adorable Stephanie Hunt, owner and designer of Bella Blvd to design a few projects for the booth--I have to laugh at myself because when I read the email, I began bouncing up and down in my chair and doing that little whisper scream--I sent her a reply email with lots of "yes, yes, yes"! I can't tell you how much Bella Blvd's products excite me. I love that you can get so many different uses from the Bits A Bella sheets and now the new Billboards sheet will help you stretch your scrap dollar a little further, which is so important in this economy. If you hop on over to the blog, you'll see all the new additions their product line-up, including chipboard alphabets!!

The new lines, Man Of The House, Estate Sale, and All Inclusive, are just simply fab! I truly loved them all, but I have to say that Man of the House REALLY excited me. I love it when a company puts out a strong masculine line. How cute is the mini argyle paper?

OK, so I ended up creating a Father's Day card, a mini album, and 4 layouts. I took pictures of the booth and let me tell you...it's AMAzing--I'll post those later, though...

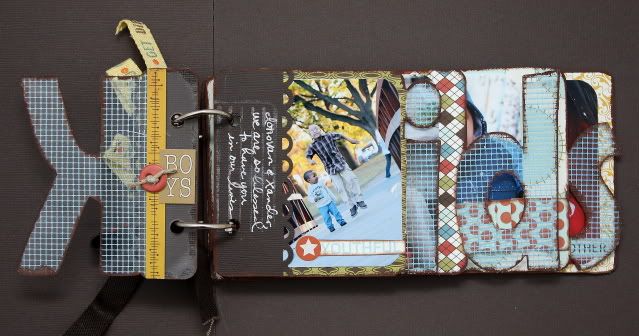
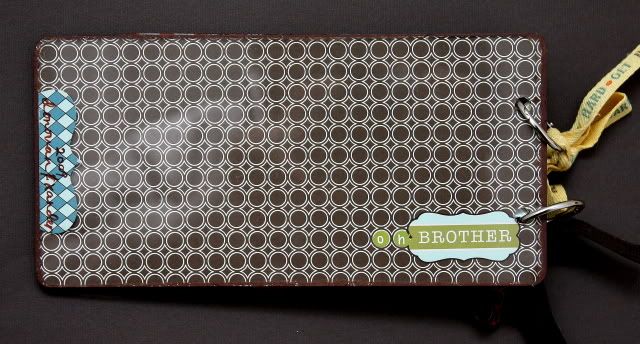
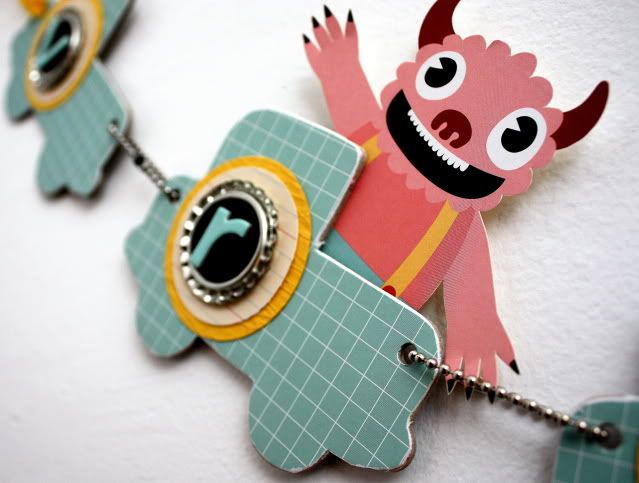
I created this acrylic mini album using Man of the House. Look at how wonderfully this line goes with Fall, Winter, and Christmas photos of my boys. Versatile is certainly a good word to describe this line!


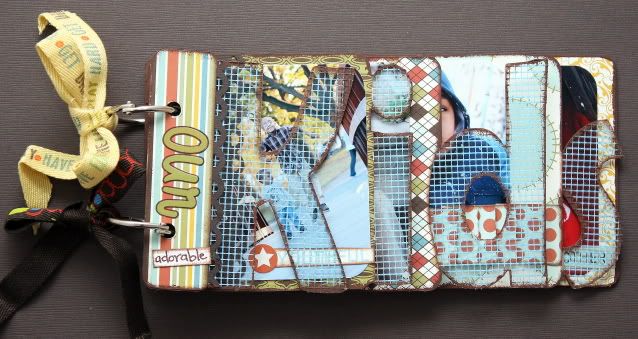
I also adore the new alpha sticker font!


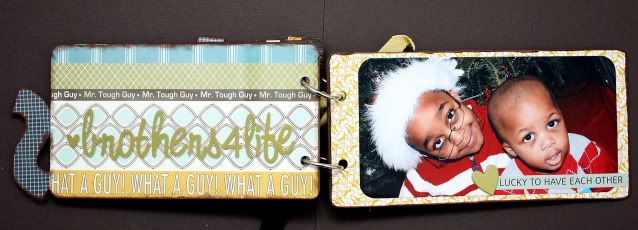
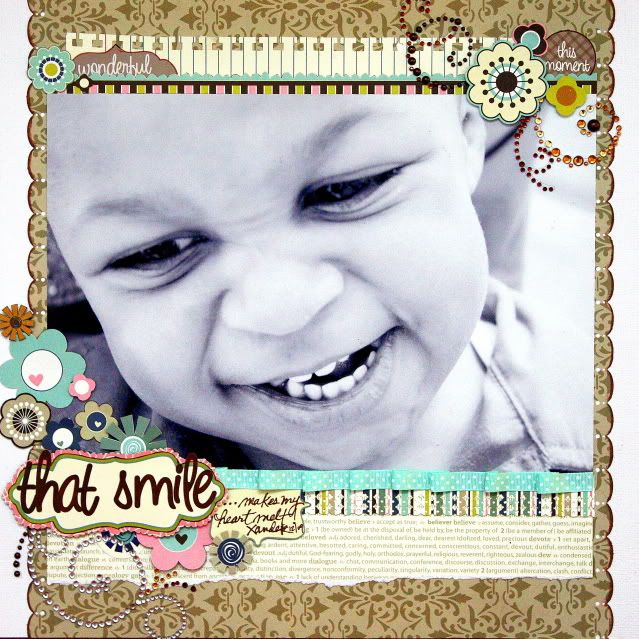
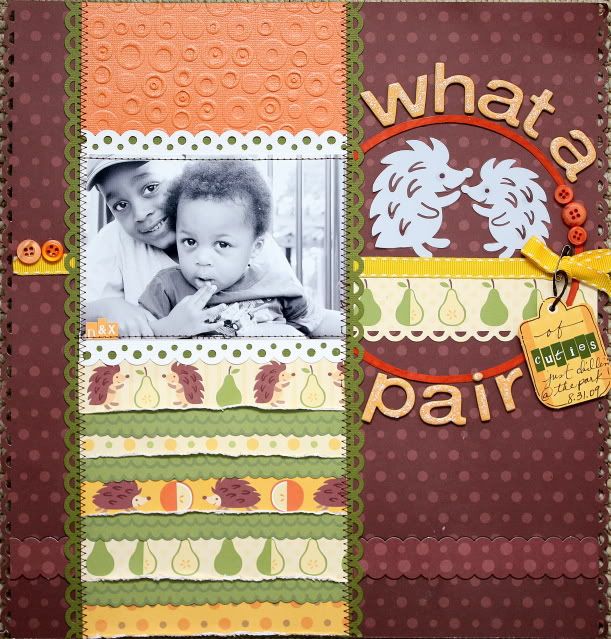
Next is a layout I created using Estate Sale. The pink, taupe and navy blue colors in this line makes it perfect for masculine and feminine layouts. OH my goodness, what a great combination! I have a few layouts in mind featuring my boys and I using papers from this line!
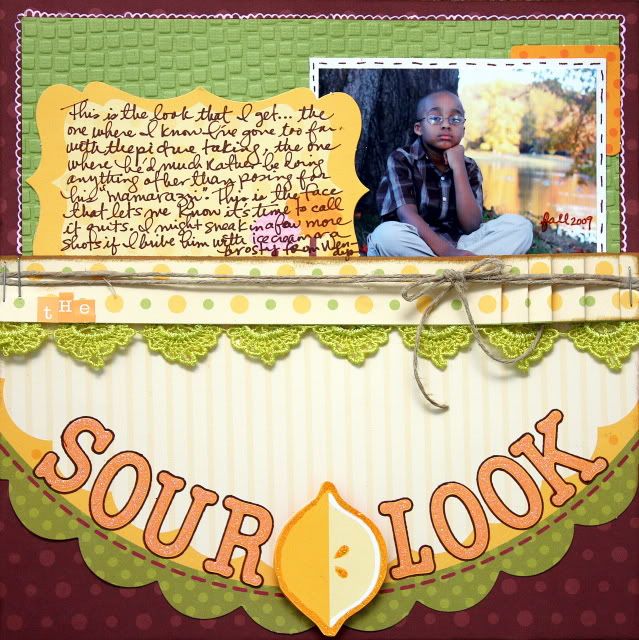
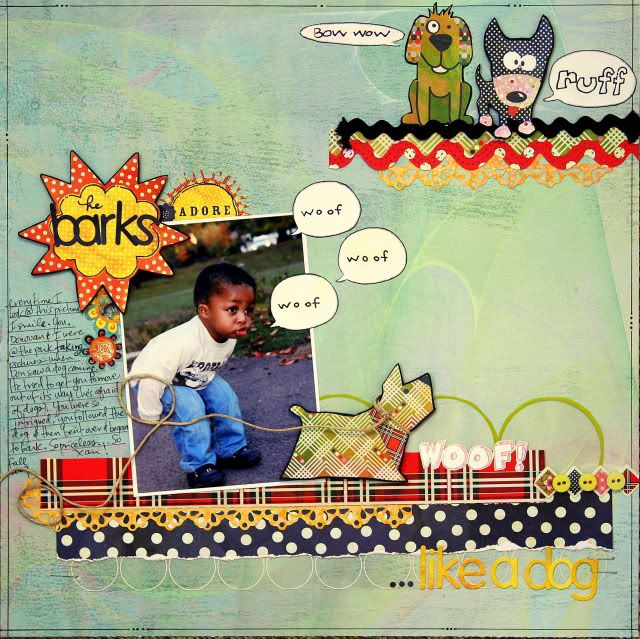
OK, now I know this may sound a little biased considering I gave birth to him, but is this not the cutest darn smile you've ever seen? I mean good gracious, now wonder he gets away with murder!
I can't tell you how quickly this page came together! The shaped stickers add the perfect sentiment! Did you notice the new dictionary printed paper? Yeah...I'm so loving that, too!!!
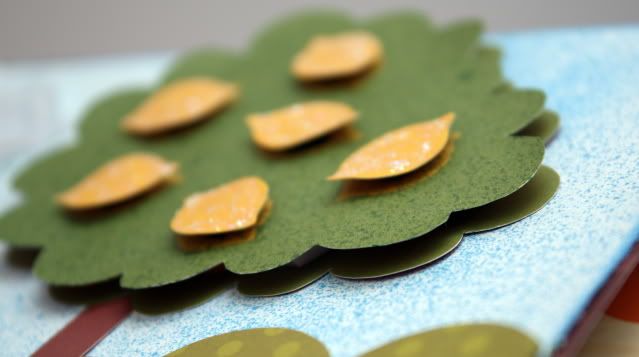
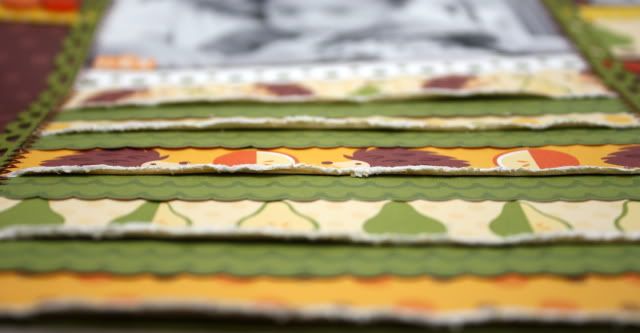
I popped up a few elements with foam adhesive to add some dimension.

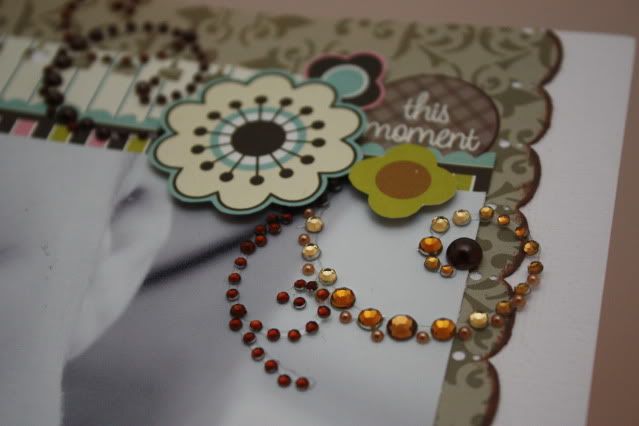
It's so easy to create your own embellishments simply by cutting elements from the papers...another smart way to stretch a buck!

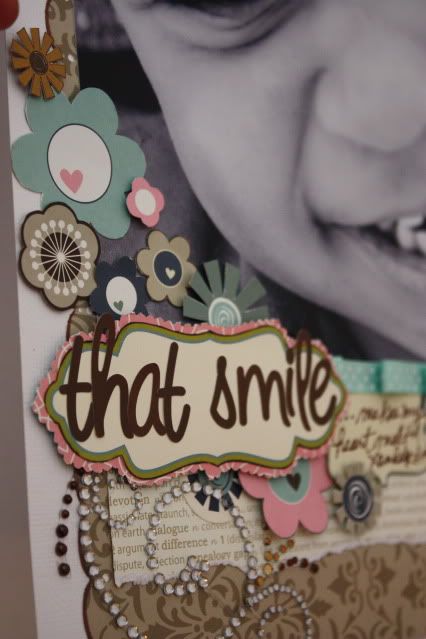
This next layout was created using All Inclusive. My mom took these photos of me on our trip to Bermuda and they're a great fit for the colors and theme.
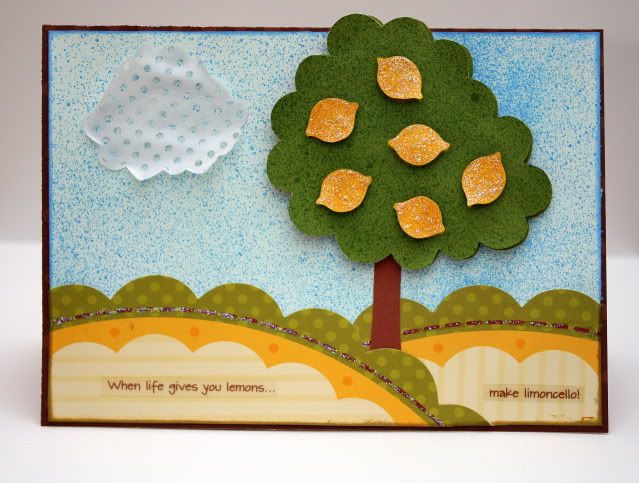
Orange and blue is at the top of my list of favorite color combinations--the green and brown really add a nice pop factor to the papers as well!

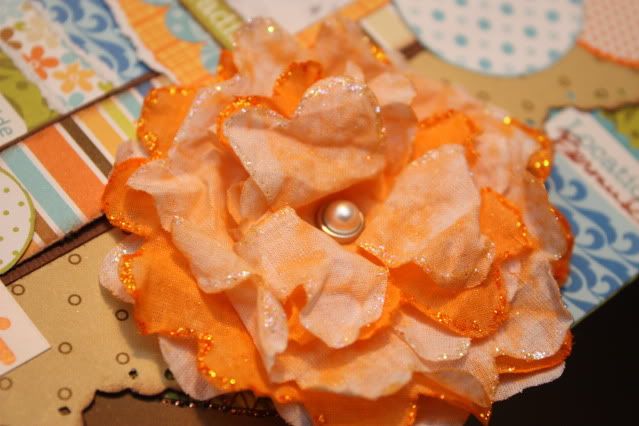
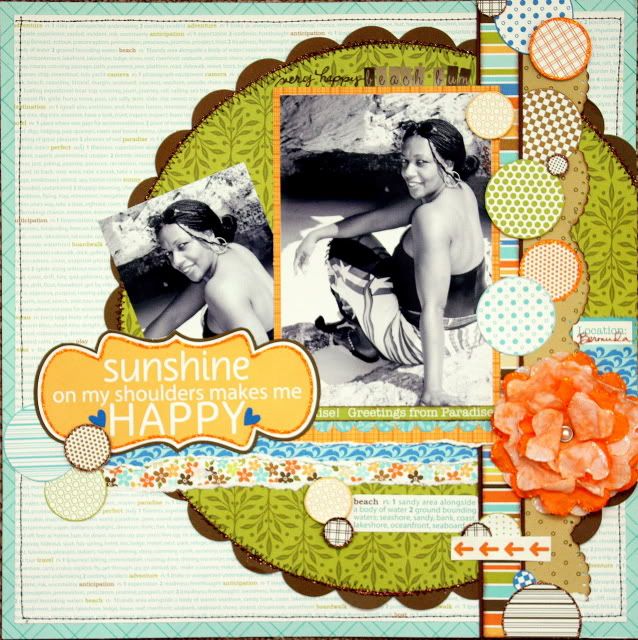
Here's a close-up of the flower--it was originally yellow and white, but I took it apart and used orangesicle glimmer mist to change the yellow to orange and then spritzed the white petals with baby's breath shimmerz. While the petals where wet, I crumpled them and then used a heat gun to help fluff up the petals. Once dried, I added orange and stardust stickles to the edges.


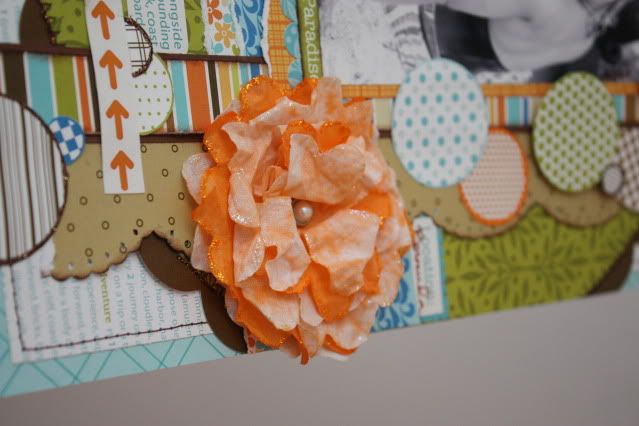
I cut circles from the patterned paper and layered them for a happy, "bubbly" effect. I love how I didn't have to do anything for the title, except cut it from the billboards sheet and add stickles. I couldn't have worded it any better!

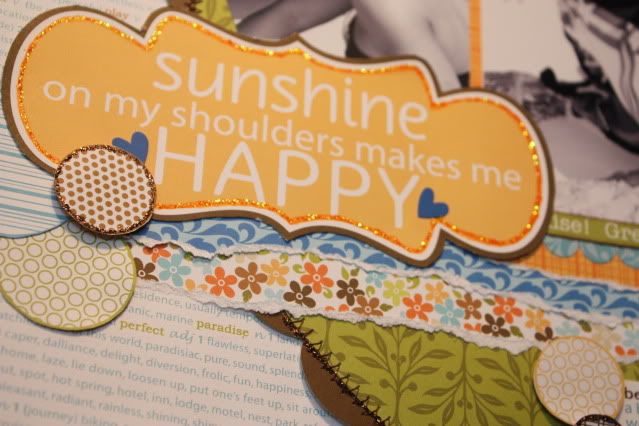
Ever since I took these pictures I have wanted to scrap them, but nothing I came across did them justice so they sat and sat on my computer. When I opened the box of Bella Goodies and saw the Man of the House line, these pictures immediately came to mind. I love that I was finally able to tell the story of Troy's first Father's Day tie!

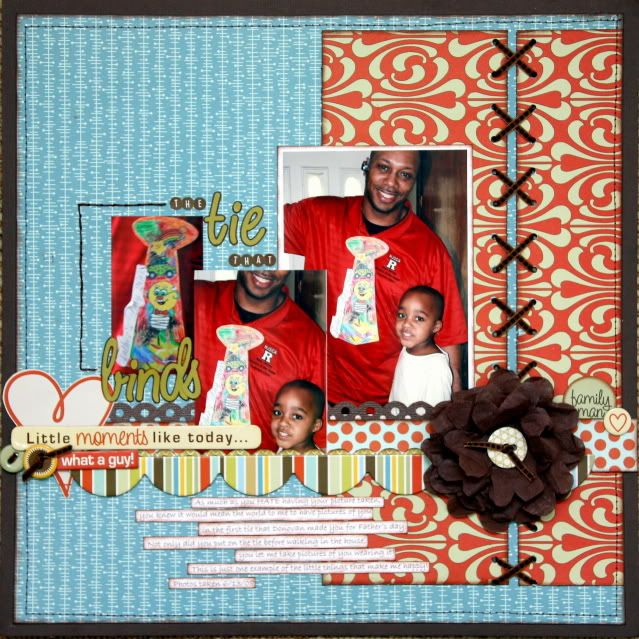
I took apart the flower and removed the yellow petals, then spritzed it with shimmerz and added a chipboard button to the center.

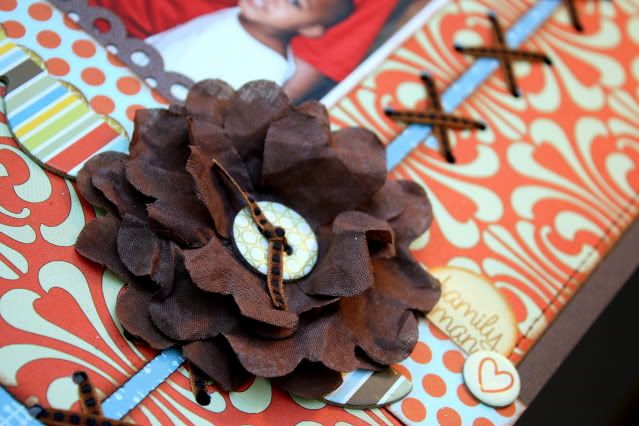
I think of all the projects, this one is my favorite! My little Boo-Boo who at the time could barely talk, learned to tell me that he loved me. That feeling is just....indescribable.
I had just gotten my hands on some new smooch spritz, so of course, I had to play with it. I used hearts as a mask and lot of stitching accents. I used the yellow petals that I remove from the previous layout on this one. I cut the smaller petal into 4 hearts and stitched them together to create a mini border and scrunched the larger petal and used it to highlight one of the chipboard stickers.
I especially made this card for my basketball coach hubby...my mocha daddy. I poured over this card for like 2 hours! I ironed an SEI iron-on onto a transparency and then traced each little piece onto scrap paper and then used the scrap paper to cut each piece from the Billboards paper, just to get it customized to my liking. I think this is at the top of my list of favorite cards that I've ever made!

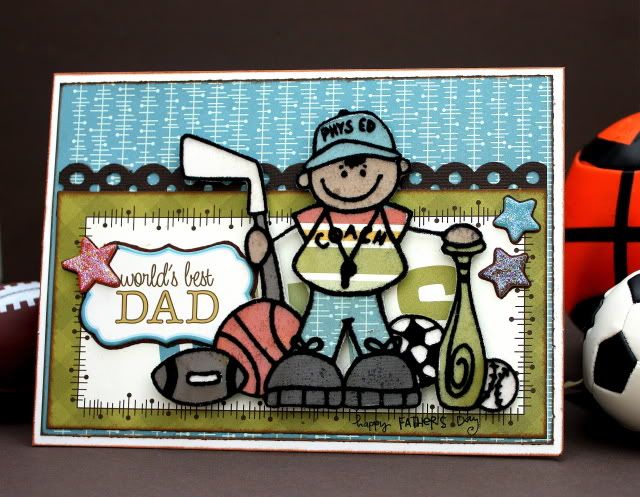
Thank you so much for stopping by. I hope you've enjoyed the projects and have gotten some ideas. If you're LSS doesn't carry Bella Blvd products, tell them to get on the ball because they simply ROCK!!!

Wednesday, January 20, 2010

My Little Shoebox Lil' Critters

Thank you all so much for the awesome comments on the work I created with Imaginary Friends. I have a few more CHA projects (1- 12x12, 1- 8x8, 2 cards, and a project) to share with you using another new release, Lil' Critters. Whenever I design with My Little Shoebox's products, my main focus is to show you how versatile the products are. I've heard a lot of people say, "oh it's cute, but it so PINK"....well, it doesn't have to be. Take a look and see what I mean...

I gave dimension to a piece of lined paper by running it through my Epic Six using cuttlebug's allegro folder. I love those pears and couldn't help but make them the focus on this Perfect Pair card...get it! LOL!

The inside of the card reads "you two are the perfect pair Congratulations and best wishes as you embark on this new journey together." I added a little twine, lace, and stickles for a rustic sophisticated look. I think the apron lace border really finishes it off.

I made this card in honor of my girlies from scrap-diner.com. I spritzed a white background with smooch spritz and shimmerz, I made the lemons extra juicy by adding stickles, and gave my transparency cloud a little pop by heating it with a heat gun just a little--enough to make it crinkle a bit.

I made the tree really pop by layering with foam adhesive. It looks so 3-dimensional in person.
Here's a layout that I created featuring my little cuties. Again, a little word play with the "pears". My original idea for this layout was to name it "Wild Pair" to go with hedgies and the pears, but I came across this photo and well...those eyes...need I say more?
See...no pink! I pumped up the texture with embossing and border punches. I also distressed the layered strips under the photo.

here's a close-up of the distressed layers


Can you tell Donovan was not happy with me in this photo? He sure knows how to put on a sour pus face...I guess he earned it honestly!
This is an 8x8 layout (man this thing is tiny compared to what I'm used to). I made it very simple so as to not overwhelm the wallet size photo. It seems that I am on a bit of an embossing roll lately! I can't help myself, I love the texture that it lends to my projects.


Last but not least, is my My Little Shoebox house. You may remember that I created a winter house not that long ago, now this one is just perfect for spring.
Did you notice the window treatments? I simply layered 2 of the photo corners from the diecut sheet on a piece of vellum. Cute right? It looks super cool with one of those battery operate tea lights inside.


Check out the adorable little hedgehog frolicking in the backyard. I cut him and the trees from patterned paper and created the "grass" by cutting slits in the circle diecut paper.

I hope I've given you some really cool ways to use MLS papers! You'd be surprised at all of the fun things you can make if you look a little deeper! If you're at CHA, stop by the booth for an up close and personal look at all the work created by the design team. If you're not heading to CHA, you can still view all of the projects on the blog.
Have a scrappy day...thanks for visiting! Smooches...


Bella Blvd Blog Giveaway

Hey there blog readers, just wanted to give you a heads up about a fab giveaway over on Bella Blvd's blog. Bella Blvd is a huge supporter of independent artists and has partnered with Faded Finds to bring you these beautiful hand painted flourish frames that are just perfect for displaying 12x12 layouts! Head over to the blog and leave a comment for a chance to win one!


Have a scrappy day!


Saturday, January 16, 2010

New My Little Shoebox | CHA-W 2010

It's that time of year again, y'all!! Can you smell the excitement in the air? The Craft and Hobby trade show (CHA) is right around the corner. In a week, I will be on a plane to Anaheim, CA, drooling over all of the crafty goodness. My first time attending CHA was this past summer and from what I've heard, the Anaheim show is a lot bigger. I can't wait...I get to meet some of the Purple Cows DT members for the first time and I get to hang out again with my crazy girls from My Little Shoebox. Those girls are so funny, they'll have you peeing in your pants...just a wee bit! LOL!!!


I'll be working both booths, so if you're at the Anaheim show, come on by, I'd LOVE to meet you and take pictures and all that good stuff!

So...now onto my My Little Shoebox goodies...


There are 6 new lines and 6 new colors of the mini alphabet. You can see all the new lines here and some of the new projects created using the new product here.


I actually had the chance to work with 2 lines this time around, Imaginary Friends and Li'l Critter. Here are the projects I created with Imaginary Friends. My assignment was to make 1 project, 2 cards, 1- 12x12 layout and 1- 8 1/2 x 11 layout.


On "Imagination Mover", I wanted to demonstrated some of the different things you could do with the large cutouts. I embellished with flowers, buttons, and stickles; used my fingernail to curl some elements, and made other elements 3-dimensional by adhering to pop dots.

My Donovan has a very active imagination, as does most 5 year olds, so I wanted to make this page look like it jumped right out of his imagination! I punched stars out of scrap paper and put them on the black background, then sprayed it with silver foil smooch spritz for a very sparkly look. I removed the stars and left behind a subtle masking effect.


here's a close-up


This card was FUN, FUN, FUN!! I ran the brown cardstock through an embossing machine to pump up the texture and the spayed it with some truffle shimmerz.
The top right photo is how the card looks when it's completely closed. When you open the door my "very scary" little monster is there to greet you with a "boo". The inside of the card reads, "have a monster-rific day!" This is great for Halloween or any day of the week!
This little pink monster makes me smile, so this card came pretty naturally. LOL!

I am soooo not accustomed to creating 8 1/2 x 11 layouts. I think I've only created like 4 in the nearly 6 years I've been scrapping. There's just not enough space for me, but I tried my best!

I printed this photo of my father-in-law with the boys from Christmas 2008. He had T-shirts made--Xander's had "I'm the boss" with his photo on it, Ronald's had a picture of Xander and read "Pop-pop says I'm the boss", and Donovan's had his picture on it and read "Pop-pop's Monster". I had to get a picture...of course none came out because the 3 of them wouldn't look at the camera at the same time, but I thought this one was a good fit for the title! Just look at the expressions on the boy's faces! LOL!

Last but not least is a Monster truck banner I created using a Maya Road mini album.

I layered punched circles and some old Li'l Davis Design bottle caps that I smashed on the trucks and then added chipboard alpha. I cut out a couple of monsters and adhered them to the back of the trucks. I think this is going to look great in the boys' playroom...once we get it together!


Have a scrap happy day! I'll post other projects later this week...thanks for taking a peek!


Wednesday, January 13, 2010

Hodge Podge Of My Little Shoebox

If you've visited My Little Shoebox's blog lately, then you'll know that we are all so very excited about CHA! While we wait for the new product to roll in, the DT went on a MLS free-for-all!

I had so much fun mixing and matching lines to create these projects.

I created "Laptop Love" using Robots Unplugged. I drew the stars on adhesive cork paper, cut them out and then outlined with distressed stickles.

journaling: how lucky are you...only 5 years old and already the proud owner of a laptop, thanks to grand mom and pop-pop. You love going online to play games. Your favorite sites to visit are: nickjr.com, starfall.com, disneyplayhouse.com, and sproutonline.com. When you grow tired of these sites, you'll ask me to google "boy big kid games". I found a site that has thumb wrestling...you really like that!

I found an awesome sketch on Sketchy Thursday's blog and used it for "Off 2 School" I also used Robots Unplugged for this layout....and lots and lots of smooch spritz.

I mixed Little Lady, Sky's The Limit, In Bloom, Turtles and Trees, My Neighborhood on "Home Is Where The Heart Is".

journaling: Donovan & Xander, the 2 of you make our home feel complete. You fill it with lots of joy and laughter.

I purchased a new border punch (why am I so addicted to them?) and of course I had to use it here. This was made using In Bloom and My Neighborhood papers.


Thanks so much for taking a peek! Check back here and on My Little Shoebox's blog for tons of great new projects from the design team using the new product lines!
Enjoy your day!


Tuesday, January 12, 2010

Television Debut

Can you see it? OK, look closely...see the price "79.95"? Now look to the left of the price....that's my project!!! And yes, I pulled a dork move and photographed the TV! I was excited, what did you expect? LOL!

Thanks for looking!

Monday, January 11, 2010

Scrapbooking | Home Shopping Network

Tonight's the night!!! Tune in @ midnight EST, 11pm Central, 9pm Pacific and again @ 7pm EST on the 12th. Check your local listings for the channel!

Vennita Wilson, design team coordinator at Purple Cows will be on HSN demo-ing some of the things that can be created with Purple Cows' products. One of the projects that'll be on display is this "Sending My Love To You" mailbox that I created using the 2-in-1 trimmer and designer click blade #2812 (stamp edge). I also used partner product provided by Cosmo Cricket (the beautiful Chemistry line), Clearsnaps, and Glue Arts.

I purchased this little mailbox from Target (the Dollar spot) quite some time ago. To finally see it completed brings me joy!

Thanks so much for the opportunity PC!!


Have a scrappy day!! Thanks for taking a peek!

Sunday, January 10, 2010

Sneak Peeks

Here's a little sneaky teasey of my project that will be on display on HSN! Check it out at 11pm Central (Jan 11th) / 12am Eastern (Jan 12th).


Speaking of sneak peeks...Creative imaginations has started uploaded sneak peeks to the blog. Click here to check 'em out!

Hope you're having a fun day! It's PJ day here in the long household!

Friday, January 8, 2010

Eye Spy | Basic Grey

Imagine my surprise when I received an email from Kelly Goree asking me to feature this layout in the "Eye Spy" section of Basic Grey's newsletter. I mean BG (as everyone affectionately calls it) has been a staple in my stash since I started scrapping nearly 6 years ago! I have an entire cropper hopper filled with nothing but BG and still have lines dating back to Sublime, Skate Shoppe and Color Me Silly, just to name a few. So receiving that email just blew my mind! I sat there staring at the computer while a smile slooooowly made it's way across my face.

This is currently one of my favorite layouts which I couldn't put in my top 25 post because it was going to be pubbed in the newsletter.

I love the photo of Xander barking at a dog that passed us in the park, I love those little doggies that I cut from June Bug, and I adore the bright colors!

Thanks so much BG!!!


Blog Widget by LinkWithin

My photo
I live in New Jersey with my husband and our 2 sons. I work full time as a Medical Technologist and volunteer for the Community Emergency Response Team in my town. I've been scrapping for the past 8 years and I truly love it because it allows me to combine my love of photography and my love of paper into one art form. I love teaching scrapbook classes and providing freelance work. Please contact me via email if you are interested in commissioning my services: tanisharenee74@hotmail.com

All content, including text, photographs, and artwork are copyright 2011 by Tanisha R. Long (except where noted). My original artwork is shared for personal inspiration only, not for commercial use. This includes contests, submissions, and publications. Any other use requires my expressed written consent.
MyFreeCopyright.com Registered & Protected

My Favorite Projects

Twitter


FEEDJIT Live Traffic Feed

Blog Archive

Labels