Showing posts with label DT projects. Show all posts

Wednesday, January 19, 2011

Finally Finished

Off to CHA they go!! My labors of love... 23 projects in total, all created this month. I am officially creatively brain dead!! If you're heading to CHA, you can check out what's inside these boxes at Bella Blvd, Cheery Lynn Designs, Creative Imaginations, and Petaloo.


Posted by Picasa

Monday, December 20, 2010

More Holiday Projeccts

You know, last week I said to myself, "I'm not going to create a holiday project for my next Cheery Lynn Designs post". Then I opened my drawer with the ton-o-unfinished alterable projects in it and found this 3 piece frame set that I purchased from Target for $2.50, earlier this year. As soon as I saw it, visions of plum danced in my head and I found myself doing exactly what I had planned NOT to do. LOL! But you know, sometimes you just have to go with the flow!


I used the 2nd smallest french flair die to cut paper and crafter's foam. I adhered the 2 together to add some dimension to the die cut. I ran the chipboard through my Epic Six with the dotted swiss embossing plate to add texture and interest to my letters before inking them and adhering to the frame. I decorate each letter with a die cut snowflake and pearl.

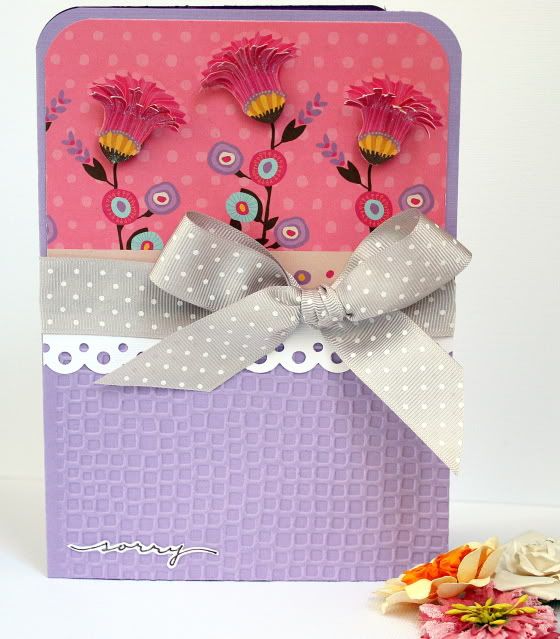
Here are a few close-up of those gorgeous flowers from Petaloo.


For this card, I cut circles using the smallest die in the XL nested circles set, cut them in half and aligned them so as to create a scalloped border. I die cut snowflakes and used them to add texture to the snowflakes in the patterned paper.


There are 5 more day left until Christmas!! I'm finally going decorate today...hope you haven't procrastinated until the last minute like I have!

Have a wonderful week!

Monday, April 12, 2010

First Buzz & Bloom Post

Hello everyone!! I am finally able to share with you my very first post for Buzz and Bloom's blog. I thought it would be cool to share a technique with you since a lot of my layouts are technique based in some form or other.

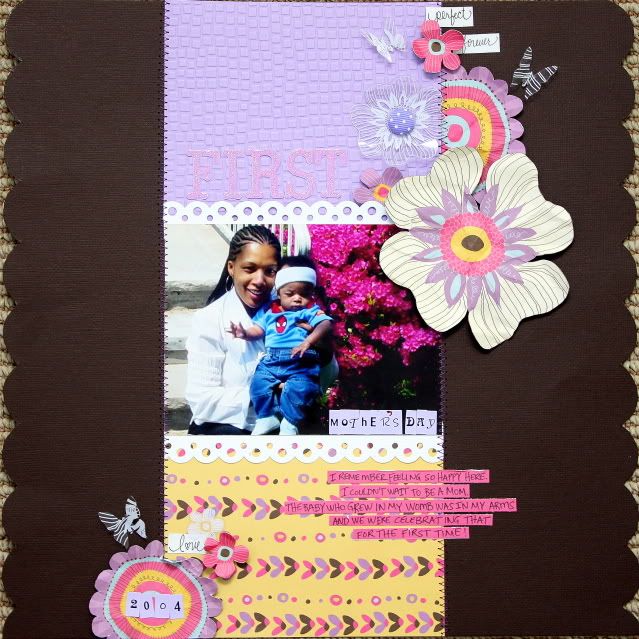
My layout is about Autumn, so I to use 2 different chipboard leaves: CB Leaves and CB Retro Leaves to accent my photo.

Bandb 011

I started by inking the CB Leaves with brown chalk ink and then coating it with rock candy crackle paint. I left the CB Retro Leaves raw and just coated them with rock candy crackle paint.

Bandb 013

I used alcohol ink on the MIR Be Mine - Love embellishment. **Please note: alcohol inks caused the mirror to crack** I used a woodgrain background and crackle paints on my layout, so I didn't mind the cracks because I thought they added to the theme.

Bandb 015

I dabbed the CB Shelby Alphabet - Uppercase with the remaining alcohol ink so that the colors coordinated with my layout.

Bandb 016

I used the denim and corduroy tokens that Div (the owner) handed out at CHA to create these fun fabric flowers. See below for step-by-step directions.

Bandb 014

I wanted my flowers to have a little sparkle to them, so I spritzed the tokens with vanilla shimmer smooch spritz and then frayed the edges.

Bandb 004

I then cut the token into a spiral as seen here.

Bandb 005

I started from the outer edge and rolled the entire spiral until I reached the center.


Bandb 008

I wanted my flower to be a little loose, so I played around with it to get it to unravel a bit.

Bandb 009

Once I was happy with the flower, I used a hot glue gun to adhere the flower to it's center. Repeat for the corduroy coaster.


Bandb 010

I hope this tutorial has inspired you to give a whirl! Until the next post...happy scrapping!


Saturday, November 21, 2009

In Bloom by My Little Shoebox

The In Bloom line by My Little Shoebox is one of the prettiest, most feminine papers I've come across lately. When I received my shipment in the mail the first thing I thought was, man this pretty and how in the world am I going to incorporate these papers into pages about boys? So I challenged myself, which you will see later in this post.

First up is a "Sorry" Card. I used an embossing folder and my Epic Six to deboss (I just flipped the embossing folder) the bottom of the card. I layered the flowers, the flower tops were cut into strips first and then painted with pixie dust blingz. I wrote the sentiment, then cut it out and painted it with pixie dust blingz as well.

here's a close-up of the flowers

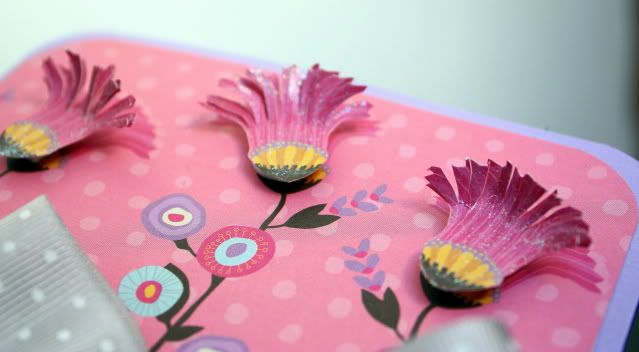
This next layout is one of my latest favorites!! This is a photo of my mom and I taken last month in Bermuda. I went super duper girly on this one and I love it! I think my mom (who has since been converted into a scrapper) will, too!
I used this layout that I created over 2 years ago as inspiration for this one.

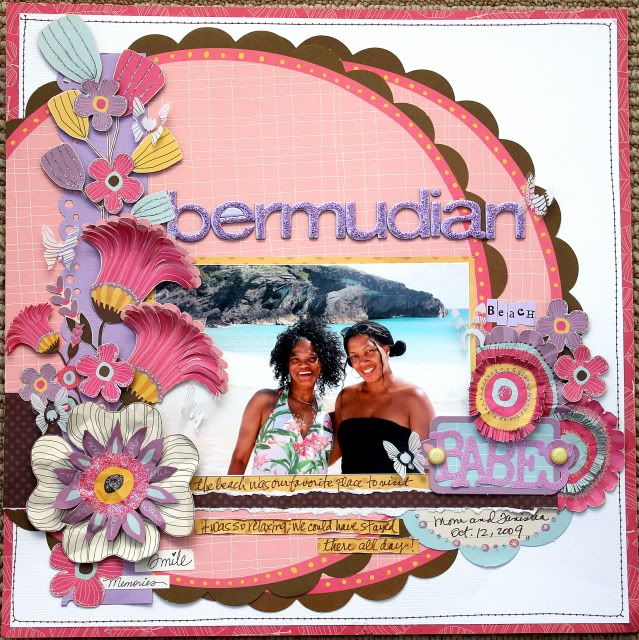
I got a little creative with the transparent overlay. Instead of cutting out the images, I used my butterfly punch and the results are beautiful little one-of-a-kind embellishments for my page.

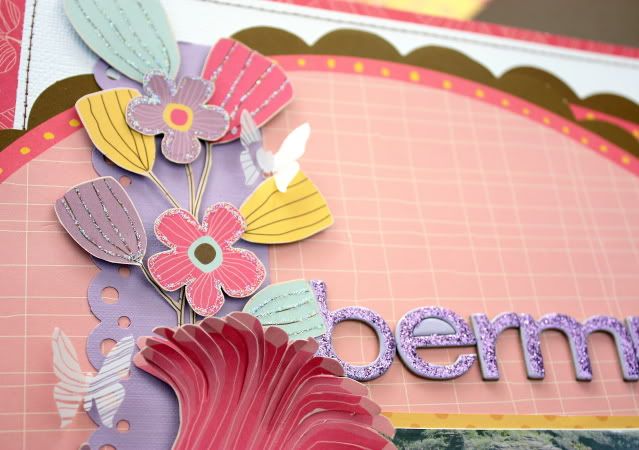
There was a lot of hand cutting going on for this page! My cutter bees got quite the work-out! So did my stickles! I crumpled most of the flowers and layered them using pop dots for added dimension. I also cut fringes in some of the flowers for that extra "touch me" appeal.

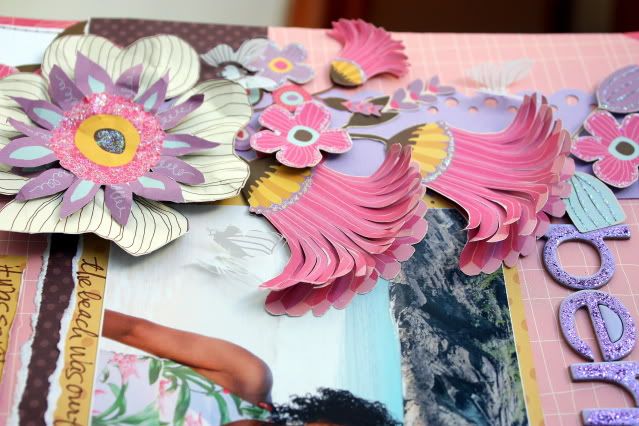
I really love these glazed alpha (see the word "babes"). They are an ingenious little invention that add the look of glitter without all of the mess.


The photo on this next layout is so close to my heart. Troy took this picture of Donovan and I on my very first Mother's Day. Donovan was about 3 1/2 months old in this picture. I remembered feeling so happy that day. I couldn't wait to become a mom!
I must have been in an embossing state of mind because I used it here, too. Hand cutting, stitching, scalloped borders give this layout all right finishing touches. One of the elements about My Little Shoebox papers that I love most, is the fact the there are always images large enough to cut out and make into personalized embellishments.
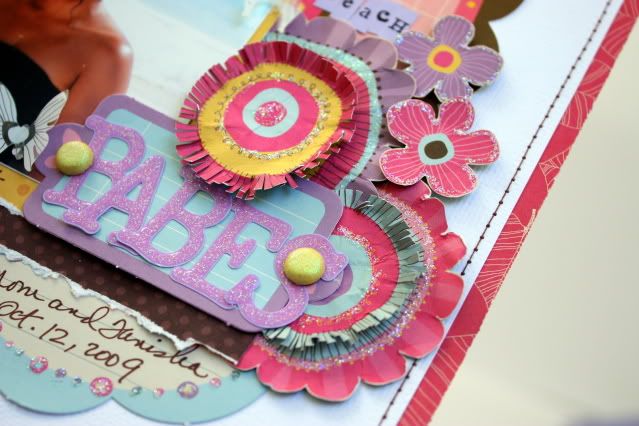
Here you can get a closer look at the butterflies that I punched from the overlay, the scalloped edges and the hand cut flowers.

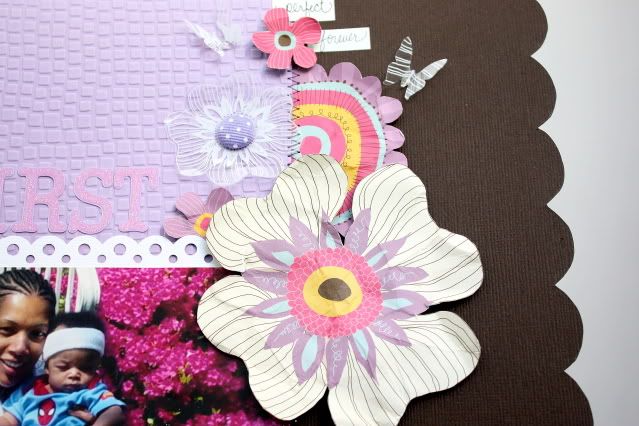
To create this next layout, I took on a dual challenge. Suzy challenged the DT to scraplift one of DT member's, Michelle L.'s layouts seen here. Instead of actually scraplifting the layout, I took some elements from Michelle's layout titled "Oh So Happy" and used it to create my own version. I loved her color blocking and stitching and how the white background made the elements pop--these are the elements that I incorporated here.
I also challenged myself to create a masculine layout using this uber feminine line. I didn't want to use pink or lavender, nor flowers of any type. Sounds hard right? It was my way of showing MLS consumers how versatile these papers can be, even if you don't think so at first sight.
So how did I do?
I took the blue and yellow patterned papers and cut strips from them. Since I was only working with 2 of the 6 different papers in this line, I had to really put on my thinking cap. I decided to add lots of texture! I cut shapes from the patterned papers and sanded around the edged before adhering them to my strips.
I did something similar to the brown cardstock. Instead of sanding the circles, I ran them through my embossing machine and then adhered them to the cardstock. I love the added texture!
I cut the artisan die cuts in half and layered them across the top. I used a border punch on the small blue strip to make it look like a blue/yellow piece of patterned paper and then stitched it across the edge.
I used twine to create a visual triangle and add texture. The chipboard letters were originally lavender, but that didn't present a problem. I just peeled off the top layer (one of the great things about chipboard) to reveal the raw texture and outlined them.
Looking at the previous 3 projects, one would never guess that this project was created from the same line!
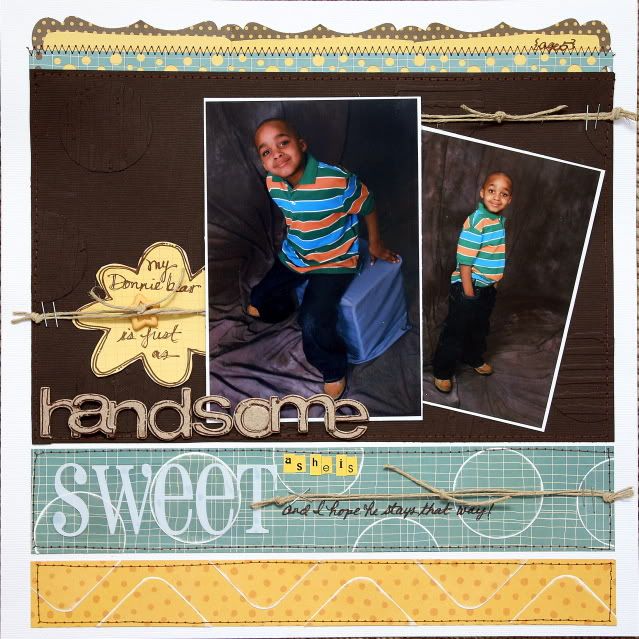
here's a close-up of the textured tone on tone circles

...and a close-up of the chipboard, originally lavender as well as the sanded tone on tone shapes.

I hope you've enjoyed this LONG post and possibly learned something new!
Take care!
Don't forget to check out Purple Cows contest. There are still about 5 weeks left to enter! For more information check out this post! There are $9000 in prizes up for grabs!!!
I have another RAK winner to announce! Rachaelwood...you've won the My Little Shoebox Little Lady line!!! Congratulations and thanks for your support in the Purple Cows Contest!!!
email me your addy and I will get your RAK out to you!

Friday, November 20, 2009

Recent Projects And A TOOT!

Before I get to the projects, I just have to pause to say I am doing the happy dance!!! Woohoo!! Wanna know why? 'Cause I just found out that I made Buzz and Bloom's 2010 design team!!!! I know I used this word a lot, but I am so EXCITED!!! Click here if you want to see the announcement and get to know the other lucky ladies!

OK, now that I've gotten that out of my system, I can show you some of my recent projects. (I have more to come this weekend).

This week, it was my turn to guest blog for Purple Cows. I created the following layout using partner product from Imaginisce, Hambly, Clear Scraps, Clearsnaps, along with Purple Cows Ultimate Trimmer II.

I really love how this turned out--the background is the perfect match for the photos. I've had a couple of crafters ask me how I created the background. I simply incorporated one of my favorite techniques when it comes to working with acrylic. I like to mount some of the papers to the back of the acrylic and the photos, embellishments and smaller pieces of paper to the front. I think this process helps to create depth as if you were creating with just paper.

I added black acrylic paint to the edges to give the layout a strong sense of definition and helps drive the "grungy" look home. I just had to add the little apples because although my Donnie is standing against a brick wall, rockin' a mohawk and a skull short, I can't help but notice his sweet smile...which looks a little like the apple! LOL!

I bought the die cut from the Scrappy Shack.

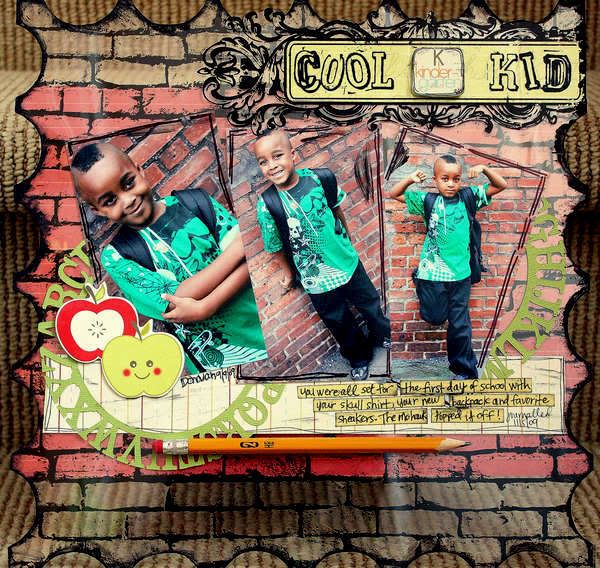
I went digging through my Pink Paislee stash again to come up with the perfect papers for my family photo. The ribbon here was originally yellow, but I used Shimmerz Spritz to change the color. I'm actually thinking about finding a 12x12 shadow box so I can hang this up. This was one of my favorite pictures from our family photo shoot!

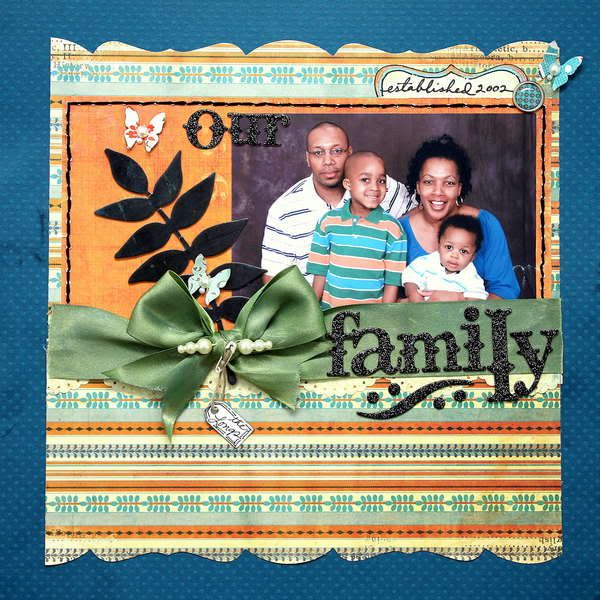
I created this next layout for the new Dream Girls challenge.

Prompt: "List It!" Use a 1-10 list on your layout, could be your favourite films, or reasons you love someone, or ten facts...

Technique: "Clearly yours" - using a clear scrapping element - like punched overlay etc...

Product: "Mix It Up" Mix up alphabets - use multi alpha stickers/ dies/ fonts etc etc

remember taking this photo like it was yesterday...but alas, it was 3 years ago! My friends and I were going out one night during our girl's getaway weekend. I decided to break out in this booty twisting and shaking dance and my friend Yvonne decided to take pictures! Being as goofy as I am, she caught me in the middle of a gut wrenching laugh! Well at least I can laugh at myself...right?!

Thanks for taking a peek!

Thursday, November 13, 2008

Scrap-Diner and My Little Shoebox Projects

I can't tell you how many LOs I've done with all of the photos I took of Donovan playing in the pool when we went to Jamaica in 2007...hence the name of THIS LO!

I sanded the edge of the shaped paper and then went around it with an edge distresser and my fingernails to get the curled look.

I've been scraplifting myself ALOT lately...the idea for this LO came from this one I created back in September.


I've been in a Christmas Craft state of mind, so I made this Finnish Star and let me tell you, it super easy and quick!! Here are the directions if you'd like to make one for yourself.

Here's a really quick LO I created with My Little Shoebox's In The Garden Line. I love this pic that I took of my sister at her wedding...she was getting ready to throw the bouquet; you can see some of the eager (and not so eager) single ladies waiting. The person who caught the bouquet deserves a LO all her own at a later time...she was downright hilarious!

and lastly, an accordian mini album also using My Little Shoebox's In The Garden Line.

the inside...

Thanks for stopping by and taking a peek!
Blog Widget by LinkWithin

My photo
I live in New Jersey with my husband and our 2 sons. I work full time as a Medical Technologist and volunteer for the Community Emergency Response Team in my town. I've been scrapping for the past 8 years and I truly love it because it allows me to combine my love of photography and my love of paper into one art form. I love teaching scrapbook classes and providing freelance work. Please contact me via email if you are interested in commissioning my services: tanisharenee74@hotmail.com

All content, including text, photographs, and artwork are copyright 2011 by Tanisha R. Long (except where noted). My original artwork is shared for personal inspiration only, not for commercial use. This includes contests, submissions, and publications. Any other use requires my expressed written consent.
MyFreeCopyright.com Registered & Protected

My Favorite Projects

Twitter


FEEDJIT Live Traffic Feed

Blog Archive

Labels