Showing posts with label my mind's eye. Show all posts

Tuesday, August 7, 2012

Hey there blog readers.  Today, I'm sharring layout featuring some of my favorite WOW! powders and WOW's Call Me Stamp set.

I used an embossing pen to outline the butterfly seen here and then used Earth tone Paprika to highlight the outline.  I embossed the pre-made chipboard embellishments with Neutral Ultra Shimmer embossing to add a little bling.
I used the postage stamp from the set to create my own patterned paper strips using Earth tone Honey and Cotton Candy. 
I changed the color of the chipboard alpha by first embossing them with Ebony powder.  Once cooled, I re-inked and then embossed with Black Glint embossing glitter.


WOW Products Used:

Earth tone Paprika
Earth tone Honey
Neutral Ultra Shimmer Embossing Glitter
Cotton Candy
Ebony Regular
Black Glint Embossing Glitter
Call Me Stamp Set

Thanks for stopping by!!


Friday, July 6, 2012

WOW Layout

Hey there!!  I'm here with a layout featuring a picture of my sweetie and I from a few years ago. When I came across this photo, I knew I wanted to scrap it, but I needed bright colors to help it pop.  That's where WOW's Suzy West's Embossing Powders in Cable Car Red and California Sunshine come in. (Pretty appropriate colors since this photo was taken in the San Diego Zoo) 


 I used them along with a chicken wire mask to create a colorful background so that the photo didn't get lost on the white paper.


 I don't know about you, but I don't think a layout s complete without a little bling.  That's where embossing glitters come in pretty darn handy!

I used WOW's Black Glint Embossing Powder with a stamp from WOW's "Is It A Bird?" set to create the tag here.  I inked the white flowers and then coated them with WOW's Neutral Ultra Shimmer.

I Used the heart border from the "Gratitude" stamp set and WOW's Clear Gloss Ultra High to add embossed heart borders to the layout.


Gratitude Stamp Set
Is It A Bird? Stamp Side
WOW Black Glint Embossing Powder
WOW Neutral Ultra Shimmer Embossing Powder
WOW Clear Gloss Ultra High
Suzy West Cable Car Red
Suzy West California Sunshine

Thanks so much for stopping by today!!


Tanisha

Thursday, May 3, 2012

Latest From Purple Cows

Well would you look at that...another blog post this week. Woohoo!!  

Today, I'm sharing a couple of projects that I created for Purple Cows.  Have you seen the new CraftGeek line, yet.  If not, check it out on the website.  I used a PunchIt on both of these layouts.


I used PunchIt Solstice and Creative Imaginations corrugated paper to create my own embellishments here.  All other papers and embellishments are from Momenta.


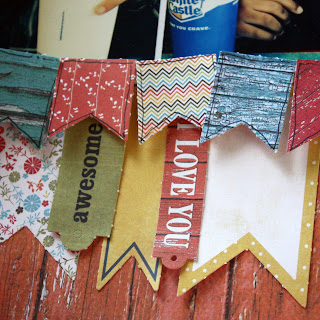
I used the PunchIt Autumn to punch designs in the corner of this layout to help frame the photos of my cutie pies and the WindIt  to create "hangers" for the banner.


Thank you for stopping by today!!  Until next post...have a scrappy day!

Saturday, March 17, 2012

52 Week Photos Mini Album

Remember the 52 week project that I did last year? Well, I took my favorite photos and scrapped them in this mini album by Basically Bare. The Rowdy Roadster mixed media album is a mixed media that was released this past CHA. I turned this album into a technique “free-for-all”! I painted, stamped, stickled, heat and dry embossed, and glittered until I liked the results.

I also used canvas leaves from the Bare Basics Blossoms and Leaves set, a chipboard filmstrip from the Paparazzi Embellie Set, and a chipboard and cardboard dress form from the Dress Me Up Dress forms set, and buttons.

I used WOW embossing powder in high gloss silver on the filmstrip and then swiped it with charcoal ink and white acrylic paint. I dry embossed the dress form and then heat embossed it using copper WOW embossing powder and then covered the bottom with strips of rosettes that were spritzed with shimmering mist. I added feathers (which are really hot right now) and pearls to really “girlify” the dress form. Before adhering the embellishments to the acrylic cover, I added a glittered flourish and swiped the back with white acrylic paint.

I added another dress form to the inside cover. I tore away the first layer of cardboard to reveal the ridges. I lightly painted it with white acrylic paint and stamped it using a stamp from WOW’s Call Me Stamp set to add the script print.
I love how the different shaped pages add so much character to this album.

I painted the canvas leaf with glimmer glaze. Once dried, I slightly curled the end to add dimension.
I created the background of this page by inking over a Tim Holtz mask and embossing with WOW powder in earth tone olive.
I ran both tags through the cuttlebug before swiping with acrylic paint and adding stickles. I love the texture that the dry embossing adds!
I swiped both with white acrylic paint so that they would stand out against the the canvas page that follows. I hot glued feathers and Petaloo flowers to the top tag and coated the embossed flourish with PK Glitz glitter on the bottom tag. I tied tulle through both tags for an added feminine touch.
This canvas page was really fun to work on. I embossed the page using WOW embossing powder in earth tone nutmeg and WOW’s brocade stamp. I have to admit, heat embossing such a large canvas area was tedious work. I had to heat it longer than paper but just shy of actually burning the fabric. Once that was done, I stitched around the page, about 1/2″ from the edge and then frayed and inked the edges.
The stitching and fraying were already done from the front side of this page. I used a mask and shimmering mist to create the background and then added rub-ons and embellishments once the page was fully dried.
This tag is wonderful for displaying either a couple of small photos or one large photo. I chose to keep the embellishments simple and added 2- 5×7 photos (one to either side of the page) and sheer ribbon for a pop of color.
I tore off the top layer of the inside of the back cover and covered the bottom with patterned paper. I painted, stamped, and added rub-ons to the exposed ridges. I nestled a felt Stack-A-Bellies Bird in the strip of rosettes, but not before spritzing it with Silver Foil glimmer mist. I attached a chipboard wing that was coated with glitter and then added pen work to the bird.
I covered the back cover with patterned paper and added strips of tulle to the rings to finish off the album.

This is probably the chunkiest album I’ve ever made, but I love every inch of it!! That’s all for now…until next post…happy scrapping!!

Sunday, January 1, 2012

Happy New Year!!

gif-Happy New Year Pictures, Images and Photos
Well, another year has passed us by. I for one love the start of a new year. I know, I know, it's really just another day, but the feeling of starting something new makes me think of all the potential that may lie ahead. Hopefully there's a new job in the works...fingers crossed.

There are so many things that I'd like to do creatively...like start a new photography project now that I've completed the 52 week project. I'd also like to get a new blog up and running. I love this one, but I'm looking for something...different...who knows, we'll see how that goes. I have to admit, I've been a little lazy with more than a few of my projects...just a phase, I'm sure, but I need to snap out of that and be the artist that I know lies within me. I want to teach more, for sure. I love teaching scrapbook projects!

Anyway, I need to get my booty off of this computer and clean my kitchen!! Before I go, I'll share a couple of the last projects that I created in 2011.

This project was created using Petaloo's Darjeeling collection and Graphic 45's Tropical Travelogue line. The flowers and papers go together so beautifully and I though they'd look lovely as a hostess gift set. I pulled colors from the papers and then mixed and matched the flowers until it was pleasing to my eye.


I created this card for Basically Bare using the Dress Forms and Blossoms & Leaves sets. To see how step by step instructions check out this post.

iside of the card reads: "...may well be reckoned the masterpiece of nature. Ralph Waldo Emerson"

Thanks for your continued support. I look forward to sharing more with you in 2012!!


Sunday, September 25, 2011

Finding Inspiration: Self Scraplift

One day one of my facebook/scrappy friends asked me how I managed to stay inspired. Her question instantly made me think of all the frustrating times when I pushed around elements, cut up papers that ended up going un-used, changed complete concepts, and searched endlessly for ideas. I told her that I wish I stayed inspired but when my mojo is at a low, I usually scraplift myself. I have found that by recreating a new layout from and older one, I can get over my creative hurdle and add a fresh new look to my project.

This layout, State Fair, is my most recently scraplifted project. The great thing about scraplifting is that you can recreate the entire project as is, by treating it like a sketch or simply extracting certain elements.

I love the "grunginess" of State Fair, the title and photo placement, the vertical line of tickets that lead the viewer's eye across the page, the outer mat, and the Hambly transparency (little circles). I took those elements and created This Girl. I maintained the "grunginess", but added some femininity to the page by using neutral kraft and pink elements. As in the first layout, I used luminarte to paint the lip of a cup to stamp circles and added splatters to the background.

I replaced the row of tickets with 2 velvet berry picks in brown from Petaloo's Chantilly collection to anchor the row of mixed blooms in cream and brown. I love these colors because they go really nicely with my skin tone and add a level of maturity to the layout. Placing the flowers in a horizontal line is one of my favorite ways to add flowers to my layouts. Not only is this a great way to mix and match my favorite flowers but it helps maintain space for other elements.

I kept the outer matting, title and photo placement the same and added the same style of transparency, in a coordinating color (this has to be one of my all time fave Hambly transparencies).

Journaling: has become a yogini and a zumba addict; rarely wears one shirt at a time; has nursed 2 babies; loves to smile and make others smile; is a student again; is passionate about scrapbooking and photography; has been with the same man for 17 years; is kind of clumsy; is flirtatious; has developed a new sense of sexy
photos taken 9.9.11
52 Week Project - Week 36/52


I replaced the gears with a layered velvet butterfly and scalloped envelop flaps that I tied with twine for a little extra texture and detail. The flaps actually open; this is also a great way to add hidden journaling to a project.

In the original project, I swiped paint around the edge of the layout. I used that same concept on my journaling strips in the new layout. I haphazardly swiped luminarte along the bottom of each strip and then adhere them to the layout, creating a visual triangle.


I used a couple of directional wooden elements from Pink Paislee to create additional horizontal lines and bring attention to the 2 photos where the subject (in this case, me) looked smaller than in the other 3 photos.

I added a touch of color to the flowers using the paint that was left over on my brush.

I had the concept of This Girl in my head for a while...just not the actual title. I had already created layouts titled I Am..., Many Things To Smile About, 15 Random Facts, 10 Things I Love About Me, Things I Love To Do...etc so I didn't want to revisit those. Then one of my good scrappy friends created a blog post with the title "This Girl", and I decided that it was perfect for my project!!

I hope this post has given you a few ideas for digging in your layout archives and revisiting a project that you loved creating!!

Have a great week!!

Sunday, January 2, 2011

Favorite Cards of 2010

I made more cards in 2010 that ever before and there's no slowing down now. Seems like the more I make, the more I fall in love with card making.

These are my 10 favorite cards from 2010:

Spider Halloween Card


Thanks Card
Joyeux Noel Card


Kraft Butterfly Card


Get Well Card


Pleated Flower Card


Be Happy Card


You Color My World Card


Thanks A Bunch Card


Perfect Pair Card


Blog Widget by LinkWithin

My photo
I live in New Jersey with my husband and our 2 sons. I work full time as a Medical Technologist and volunteer for the Community Emergency Response Team in my town. I've been scrapping for the past 8 years and I truly love it because it allows me to combine my love of photography and my love of paper into one art form. I love teaching scrapbook classes and providing freelance work. Please contact me via email if you are interested in commissioning my services: tanisharenee74@hotmail.com

All content, including text, photographs, and artwork are copyright 2011 by Tanisha R. Long (except where noted). My original artwork is shared for personal inspiration only, not for commercial use. This includes contests, submissions, and publications. Any other use requires my expressed written consent.
MyFreeCopyright.com Registered & Protected

My Favorite Projects

Twitter


FEEDJIT Live Traffic Feed

Blog Archive

Labels