Friday, December 31, 2010

My 2010 Movies List

I love going to the movies!! The giant screen and surround sound, the freshly popped popcorn...mmmmm!! My favorite types are chick flicks and action flicks, with a kid film for my boys thrown in for good measure. There were so many good movies in the theater this year, some of which I'm waiting to watch On Demand on those day when there's nothing on TV.

This is a list of all of the movies that I saw in theaters this year:

Book Of Eli
Valentines Day
Brooklyn's Finest
Bounty Hunter
Back-up Plan
Sex and the City 2
Karate Kid
The A-Team
Toy Story 3
Inception
Salt
Takers
The Town
Social Network
Megamind
Tangled

Happy New Year's Eve!!

Thursday, December 30, 2010

Club Penguin Game Day | Disney Interactive Studios


Someone is bouncing off the wall with excitement because Club Penguin Game Day has arrived at our house! Not only does Donovan (my soon to be 7 year old) get to play for hours on end, he also gets to help me review the game here on my blog.

Club Penguin Game Day, released in Sept 2010, is a series of party games for the Wii and Nintendo DS based on Disney's popular online game, Club Penguin. The game can be played in single player mode or with up to 4 people at a time. Players are able to customize their penguins and compete in challenges such as Java Sack, Bean Balance, Fast Freeze, Sled & Slide and Sumo Smash. Players attempt to conquer as much territory as possible and are rewarded by earning coins and other items as well as unlocking other challenges.

What I like most about this game (and other Disney Interactive Studio games) is its easy start up. Playing was as simple as putting the game in the console, creating a character, and chosing a challenge. Each challenge has a "learn" button. Click on it and the instructions are broken down into 4 basic steps. Some challenges include "advanced" instructions for more in depth play.

Donovan liked playing the games because "they're fun". I asked him which challenge was his favorite and his response was "every single game".

Disclosure: I received a copy of this game for review. The opinions here are 100% mine and my son Donovan's, who's the video game "expert" in our house.

Thanks for stopping by today!

Monday, December 27, 2010

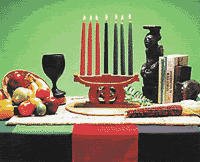
Happy Kwanzaa

photo credit: photobucket ( Natasha Crawford)


Friday, December 24, 2010

Echo Park Guest Blogger

Christmas came a day early for me! Today, I visited Echo Park's blog as I have for the past 12 days to see if I was chosen as a guest blogger and guess what...I was!! This really made my day!! I am a huge fan of their products!!

You can heck out the post here.

Both projects were created using the Merry Christmas line. I used lots of Cheery Lynn Designs dies here, too. It's hard to tell from the photo, but I embossed the music paper with the Bricks embossing plate before attaching to the house. I also used the Lattice die to create the window panes.

I've had these little Christmas lights in my stash from the very first Christmas layout I ever created...waaaay back when. I strung them on a piece of 24 gauge wire and hot glued them to the tinsel.

I love how well sand paper takes to these papers. I sanded the edges of the border punched strips so each one stands out.

I cut the Picket Fence border from both chipboard and patterned paper and adhered to the back of the house to add dimension.

I just love how easily you can layer the stickers in this collection. I cut up the string of lights stickers, placed them to the tree sticker and adhered it with pop dots.

I also created a layout with this collection featuring my little guys. I used lots of stickers here; layering for depth and dimension.

Thanks so much Echo Park for making my day extra special!!

Merry Christmas everyone!! I hope your day is filled with love and blessings! Until the next post...

Monday, December 20, 2010

More Holiday Projeccts

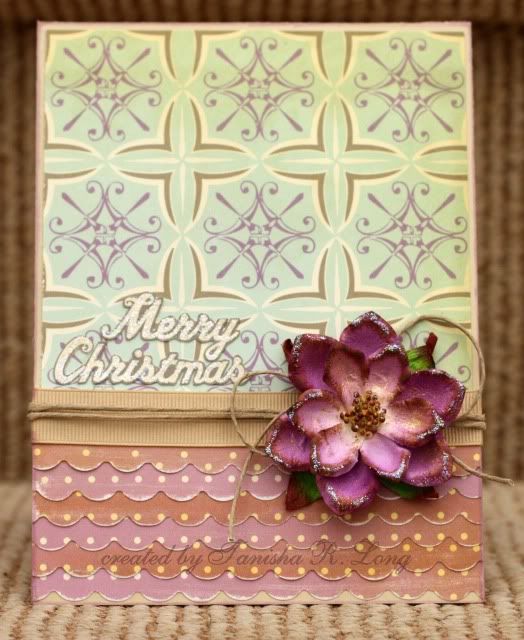
You know, last week I said to myself, "I'm not going to create a holiday project for my next Cheery Lynn Designs post". Then I opened my drawer with the ton-o-unfinished alterable projects in it and found this 3 piece frame set that I purchased from Target for $2.50, earlier this year. As soon as I saw it, visions of plum danced in my head and I found myself doing exactly what I had planned NOT to do. LOL! But you know, sometimes you just have to go with the flow!


I used the 2nd smallest french flair die to cut paper and crafter's foam. I adhered the 2 together to add some dimension to the die cut. I ran the chipboard through my Epic Six with the dotted swiss embossing plate to add texture and interest to my letters before inking them and adhering to the frame. I decorate each letter with a die cut snowflake and pearl.

Here are a few close-up of those gorgeous flowers from Petaloo.


For this card, I cut circles using the smallest die in the XL nested circles set, cut them in half and aligned them so as to create a scalloped border. I die cut snowflakes and used them to add texture to the snowflakes in the patterned paper.


There are 5 more day left until Christmas!! I'm finally going decorate today...hope you haven't procrastinated until the last minute like I have!

Have a wonderful week!

Friday, December 17, 2010

About Xander

photo taken 9/23/10

Have I told you lately how much I love my little Xander? He is such a fun and funny kid and keeps me laughing on a daily basis. Even when he's not trying to be funny and he's in a funky, stubborn mood, he's still funny...the way he whines and pokes out his lip to get his way...oh my goodness! He gives the best hugs and kisses and loves to snuggle and scrapbook with me.

He's 2 1/2 now and has reached a major milestone...he is FULLY potty trained!!!! Oh this is my favorite part of toddlerhood...NO MORE DIAPERS!!! YAYYYY!!! Whenever I'd take him to a public bathroom, I would layer the toilet with toiler paper. He would say "OK mommy, make a picture so I can go potty". Now he stands up which is even better.

He's so excited about Santa Claus. He sings Christmas songs and even mimics Santa Claus... "Ho, ho,ho, Meh-wy Kih-mis!" I can not wait to see his little face light up on Christmas morning.

He has grown in leaps and bounds! Look at these 2 layouts and see how much he's changed physically in a matter of only a year and a half. I miss that little baby 'fro and those chubby cheeks, but I love that he's learning so much more and gaining more independence.


layout created for gonescrapbooking/examiner.com

layout created for Creative Imaginations


Eight more days until Christmas...I'm sure I'll have plenty more stories, photos, and projects to share with you in that time! Until the next post...

Have a fantastic weekend!

Monday, December 13, 2010

All About Cards

Hey bloggy friends!! Today's post is all about cards! I think I've said this before, but there was a time when I did not consider myself to be a card maker, but I've been making more than ever before. There are still some that are duds, but there are also a lot that I like...and even give away.

First up, I'm sharing a card that has been published in the Jan/Feb 2011 issue of Paper Crafts magazine. Have you seen the issue? It's brimming with GORGEOUS creations...I'm so honored to be among them.


Next, is a card I created for gonescrapbooking/examiner.com using Cosmo Cricket Mitten Weather. I just love the how this line offers both traditional and non traditional color combinations.


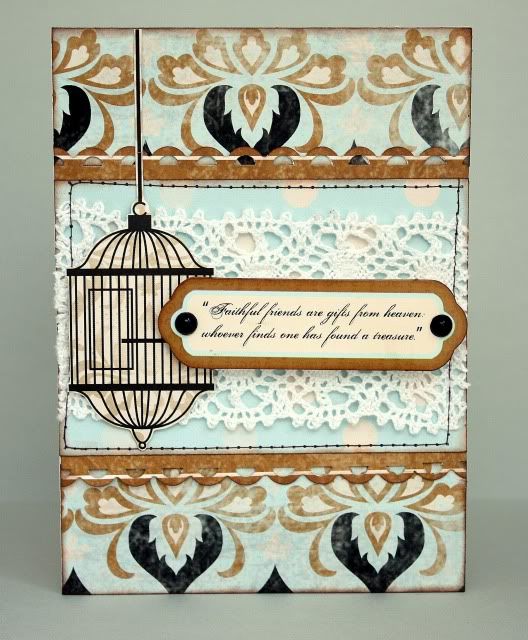
Next up is a card that I created this card for Cheery Lynn Design. I plan to mail it to my friend who doesn't celebrate the holidays with a few updated pics of the boys inside.

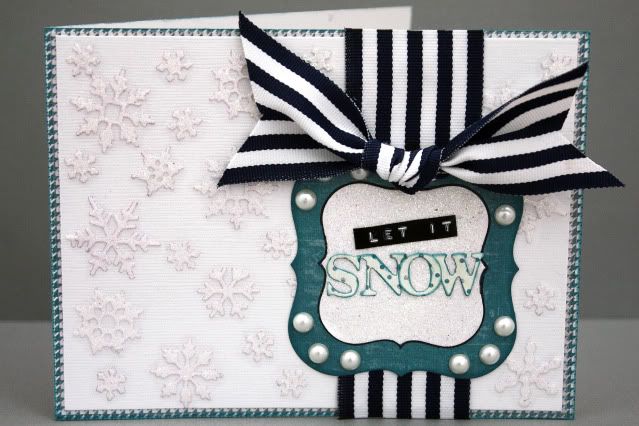
I've had a ball playing with my CLD dies! I used French Flair, Snowflakes, and the 1/2" School Days Font to create this card. I had an attack of "lazy scrapperitis" and decided that I didn't have the patience to adhere each of those snowflakes individually. Instead, I arranged them on the panel, placed it in a hot pocket and laminated it using my Purple Cows laminator. It was so quick and easy...and neat!


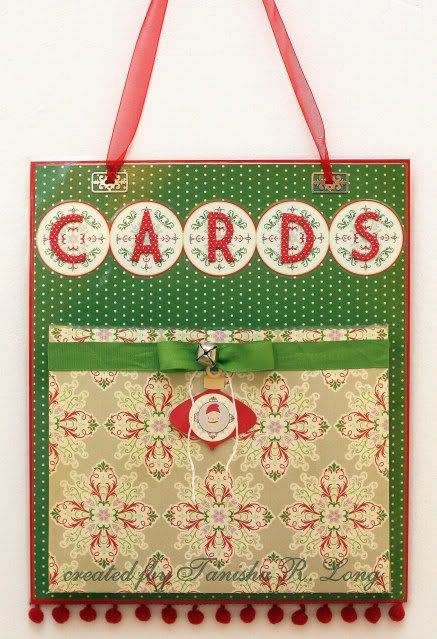
Lastly, I made this laminated card holder for Purple Cows. For complete instructions to recreate this project click here.

You can see the pocket better from this angle.


See that little metal staple right there where the ribbon is? Well, that's something new coming from Purple Cows...it's fun and super easy to use, so keep your eyes peeled!


Thanks so much for dropping in today!! I really appreciate the time that you've taken out of your schedule to pay me a visit and leave comments!!

12 More days until Christmas...

Friday, December 10, 2010

Recent Projects and Winner

Before I get to the projects, let me congratulate Rochelle for winning the giveaway posted here. I used random.org to randomly draw a number and it chose #1!! Congratulations and email me with your address and I will get your package out to you.

I found this adorable sketch on Bela Blvd's blog last month and was instantly inspired to create a layout for gonescrapbooking/examiner.com with it. I used One Fall Day and a sheet from All Inclusive for the background. The photos are from the day I took the boys pumpkin picking and hay riding.


This is a quick and easy tag that I created using Creative Imaginations and Petaloo products.

Thanks so much for stopping by the blog today! Have a great day!!


Thursday, December 9, 2010

Disney Holiday Event

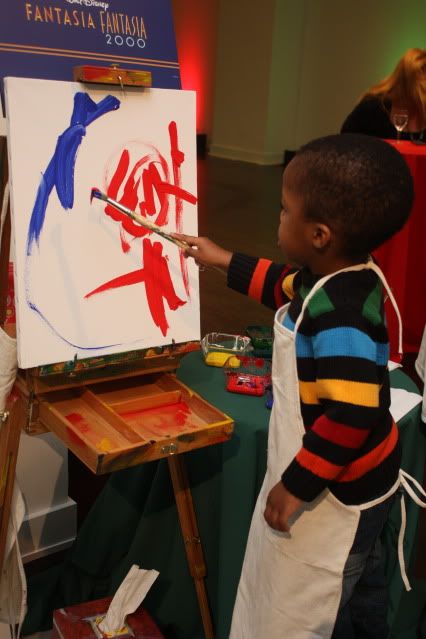
I've had so many projects to post recently, that I have yet to have a chance to tell you all about the wonderful time the boys and I had at Disney's Holiday Event last month. There were a few stations set up around the room for families to visit. Being a scrapbooking mom, you can imagine that my boys were instantly drawn to the arts and crafts tables. They had a chance to paint a canvas, make Christmas ornaments, and even decorate cookies...which barely made it home in one piece as they were devoured by my little cookie monsters!

Then Donovan realized that there were 5 plasma TVs, each with a different interactive Disney game hooked up to it. Each of the games were released in November 2010. Disney Party Hits was one of the faves. It's a karaoke style game that takes things a step further because there's a vocal training option which helps you practice in order to get a better score. Once you are ready to play, there are a list of songs featuring Disney's singing stars to choose from. Donovan's favorite song is "It's On" from Camp Rock. Even 2 year old Xander got in on the act! He loves "Boom Boom Pow".

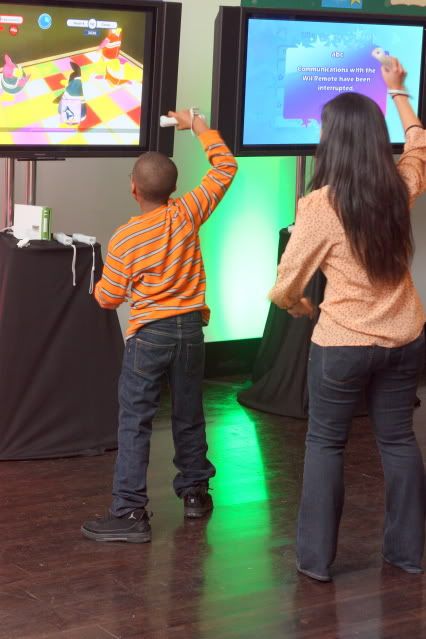
Donovan's ultimate #1 fave was this game...

I couldn't pry him off of it!! LOL! Here he is showing Sunny some of his awesome dance moves. The great thing about these games is that they 1. are easy to use...it's as simple as putting the disc in the Wii and 2. they get the kids moving! By the time I was able to convince Donovan that it was time to go (we had parent teacher conference that same night) he had worked up a serious sweat and was out of breath,but love every second of it! On our way back to New Jersey, I couldn't help but smile as his eyes lit up every time he talked about playing this game!

He still keeps reminding me that we have to put it on his Christmas list!


Disclosure: I received a gift bag with 2 video games as I left the event. All opinions are 100% my own.

Wednesday, December 8, 2010

On The Seventh Day Of Christmas...

...Petaloo gave to me soft flowers 'n leaves from Chantilly!!

Hey there everyone!! I have the pleasure of welcoming you to day 7 of the 12 days of Christmas, a joint venture between Petaloo and Pink Paislee!!! Visit both blogs and you can check out all of the AMAZING projects created by both teams.

Today, I have a few gorgeous Christmas ornaments to share with you. I just love, I mean really LOVE Petaloo's Chantilly Collection! One of my favorite products from this collection are the velvet hydrangeas. They're soft...some are layered, some have delicate pearls in the center and all have glitter gracing their edges.

I made the velvet hydrangeas the center of this first ornament and it was very easy to do. I purchased a plastic craft ornament and then used my hot glue gun to adhere the flowers to the ornament. I started from the bottom and then worked my way up to the top, making sure that the entire ornament was covered. I then cut a 12" x 1/2" strip from Pink Paislee's Father Christmas Special Delivery paper and created a paper bow. I adhered a gem to the center of the bow and my ornament was ready to hang on my tree.

Flowerornament

I wanted to play around with the vintage feel of the Father Christmas papers on this next ornament, so I inked the papers and then machine stitched some lace around the edge. I started by cutting one of the images from the Trading Card paper and then layering with Special Delivery and Stockings papers. I used jump rings to attach a punch out donned with velvet hydrangeas and Magnolia leaves from the Canterbury collection to complete the ornament.

Santaornament

here's a close-up of the flowers

112210 009

This last ornament was a lot of fun to create! I purchased a styrofoam cone and a Christmas pick from the craft store. The pick had these really ugly holly leaves on it so I cut them off before attaching the pick to the cone.

I started by covering the entire cone with Special Delivery paper and then hot gluing a string of pearls around the edge. I added glue to the end of the pick and then stuck it in the center of the cone. I used velvet poinsettia, metallic rose leaf spray, and velvet leaves to fill in the gaps.

I added a bell to the end of the ornament and a nice velvet ribbon to hang it on the tree. I love the way this came together!

Coneornament

here are a few of the close-ups

112210 012

112210 017

112210 020

112210 019

I hope these projects have inspired you to create your own ornaments. I can't wait to put these on my tree!!

Have a happy scrappy day!


Tuesday, December 7, 2010

I Heart Faces: Self Portrait


It's Self Portrait week over at I Heart Faces!! Is it strange to say that I take a lot of self portraits? Well I AM a scrapbook artist...one who believes that it's equally important to record myself in my scrapbooks as it is everything else. Whenever I ask someone to take my picture for me, it rarely comes out nice, so I listened to the old adage, If you want something done right (or at least the way I want it done)...

I had a couple of pictures in the running for this post, but decided to go with this one because it tells a lot about me. My hair is braided and I have on short sleeves, which means that the weather is nice. I'm also wearing my signature style hoop earrings and one of my favorite necklaces. Although I can't see the necklace in it's entirety, the chain reminds me of what it looks like. The minimal make-up reminds me that I am a mom who no longer has the time (or energy) to get all "fancified".

Anyone else looking at this photo could probably guess that I had the chicken pox in my lifetime, thanks to the pock mark left between my eye brows and that I'm married. I guess it's right what they say...a picture is worth a thousand words.

I like the way half of my face is lit while the other half is in the shadow. Kind of adds a little mystery to me. Of course anyone who know me knows that I'm a what you see is what you get kind of gal. LOL!

So this is my entry for this week. Enjoy!


Monday, December 6, 2010

Christmas Gift Bag

It's that time of year when many of us go out to search for the perfect gifts to give to our friends and loved ones. Once you find that perfect gift, what better way to present it than in a stunning handmade gift bag?!

Happy Monday everyone!! I am so thrilled to present my first project as a member of Cheery Lynn Designs DT to you today.

I created this gift bag using 2 different sets of nested dies: French Flair and Coved Rectangle
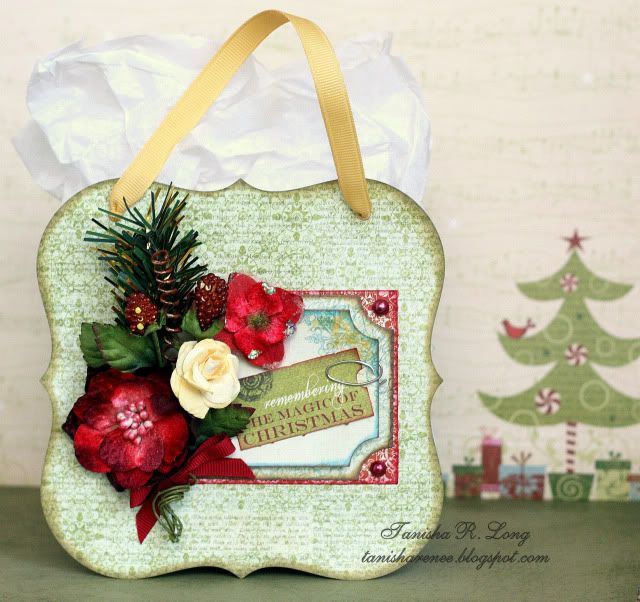


I started by using the largest French Flair Die to cut 2 panels from Pink Paislee Father Christmas 6x6 paper pack with my Epic Six die cut machine. I inked the edges and then set aside.


Next, I cut a 12"x 3 1/2" strip from patterned paper (Father Christmas) and scored 1/2" from the edges of the long ends and 4" from the shorter ends and then folded, as shown. NOTE: I wanted this to be wide so I could fit a size present in it, but you can vary it to fit your needs. Just cut the strip 1" wider than you need because you're going to need to score 1/2" on each side to attach the panels.


I folded the strip, as shown and used Helmar Premium Craft glue on the corners. I used the paper clips just to hold it in position, once dried, I removed them.

I adhered the folded strip to one of the panels, a little closer to the bottom to leave room to punch holes at the top for the handles.

I adhered the second panel to the strip and ensured that the bag was straight before the glue dried completely.

Next, I die cut 2 panels using the 2nd and 3rd largest Coved Rectangles. I inked the edges and then layered them using foam Zapdots for dimension. I matted the layered piece with a piece of inked red patterned paper and then adhered to the front of the gift bag about 1/2" from the right side.

Finally, I decorated the bag with Petaloo Chantilly flowers and a Canterbury pick, a paperclip, pearls, and a die cut sentiment from Father Christmas. I punched holes in the top and used ribbon to create the handles.

Here's a close up of the front
.
supplies: patterned paper, die cut- Pink Paislee; flowers- Petaloo; ink- Clearsnap; ribbon- Savvynsassy; dies- Cheery Lynn Designs;Pearls- Want 2 Scrap; adhesive- Helmar; paperclip

Thanks so much for stopping by the blog today. I hope this project has inspired you to make one of your own for any occasion! They are super easy and FUN! Be sure to check out Cheery Lynn Designs blog everyday to see what our amazing DT is up to!!

Until next post...have a scrappy day!


Blog Widget by LinkWithin

My photo
I live in New Jersey with my husband and our 2 sons. I work full time as a Medical Technologist and volunteer for the Community Emergency Response Team in my town. I've been scrapping for the past 8 years and I truly love it because it allows me to combine my love of photography and my love of paper into one art form. I love teaching scrapbook classes and providing freelance work. Please contact me via email if you are interested in commissioning my services: tanisharenee74@hotmail.com

All content, including text, photographs, and artwork are copyright 2011 by Tanisha R. Long (except where noted). My original artwork is shared for personal inspiration only, not for commercial use. This includes contests, submissions, and publications. Any other use requires my expressed written consent.
MyFreeCopyright.com Registered & Protected

My Favorite Projects

Twitter


FEEDJIT Live Traffic Feed

Blog Archive

Labels