Monday, November 30, 2009

Double Masking Technique


Hello everyone!! I am so excited to share with you this Shimmerz technique that I created. It was supposed to be a video, but my little guy got hold of my video camera one day. I took it and hid it from him and forgot where I put it! I found it after the fact, thank goodness...hiding in plain site--LOL!


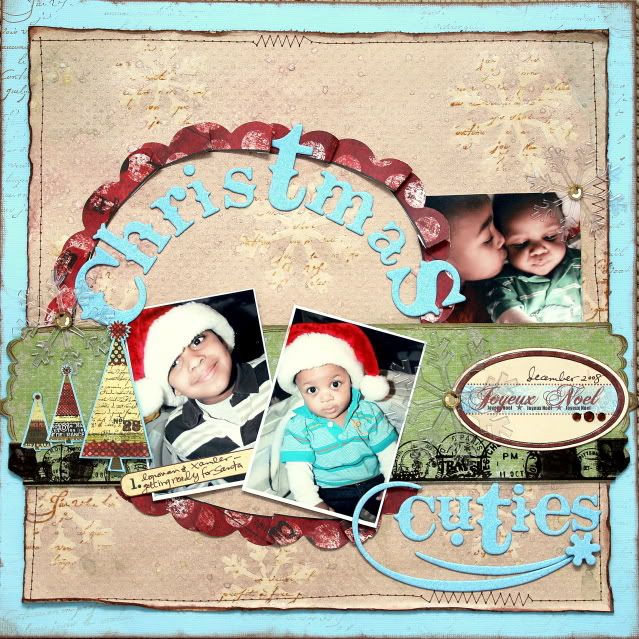
I did, however manage to take step-by-step pictures of my technique. I hope you'll enjoy it and try it out for yourself! I created this layout of my little cuties using the gorgeous December Kit from Timeless Daydreams. I really wish you could see this in person! The sparkles are so beautiful, it would make your eyes water! I even spritzed the Prima package insert with baby's breath shimmerz!

This layout was created using a Sketchy Thursdays sketch.

To create the first part of the mask, I started out with a plain piece of white paper trimmed to the same size as my background; in this case 11x11. (NOTE: use a cheap piece of paper for this, instead of cardstock. I used one of the inserts from an album protector sheet.)


I sporadically placed Heidi Swapp acetate snowflakes on the paper and traced them.
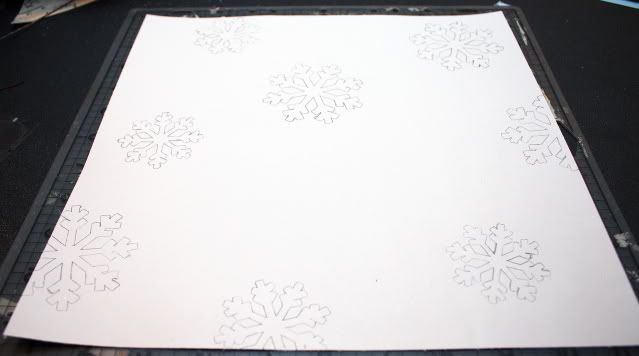
Using a craft knife and a pair of microtip scissors, I very carefully cut the snowflakes from the paper. This is going to serve as a mask for the stamping portion of the technique.
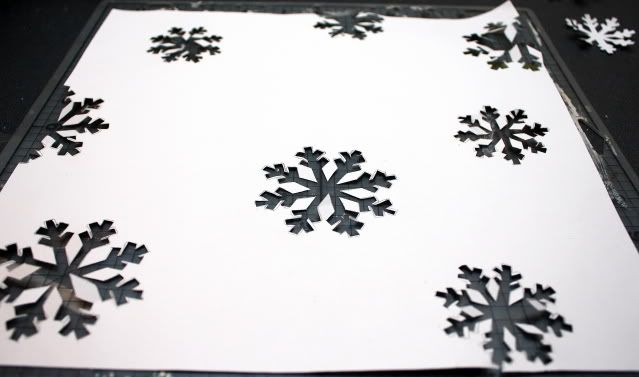
I then placed my mask over my 11x11 piece of background paper. I used Bazzill Swiss dot because it adds a little extra texture.
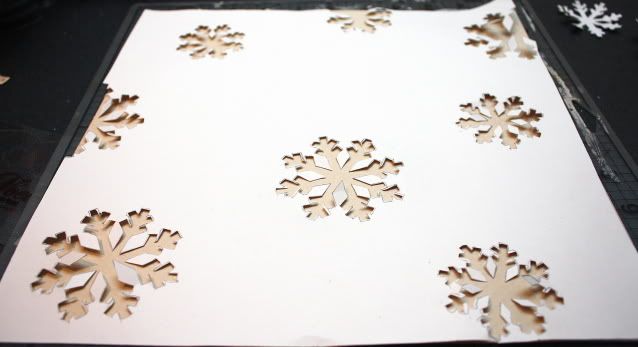
Next, I stamped the french script image across the negative snowflakes. You could use any small image for this part.
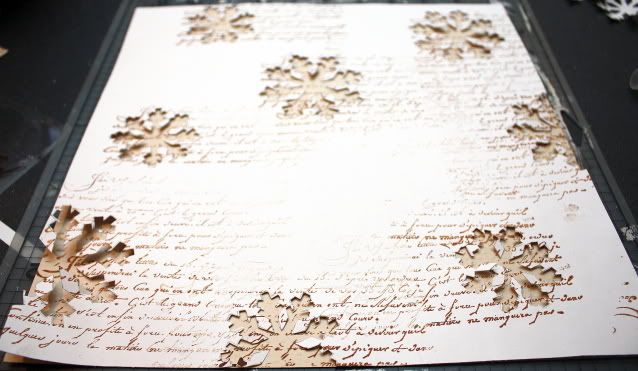
I then removed the white paper and placed the acetate snowflakes over the stamped images. This is for the second part of the masking technique.
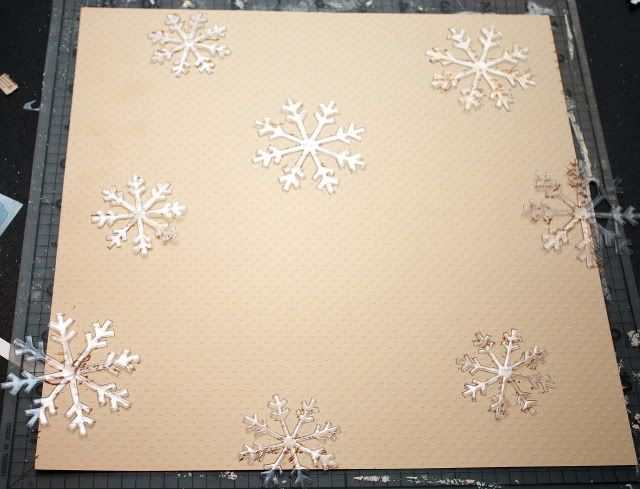
Next, I spritzed mudpie, olive branch, and barn door Shimmerz Spritz across the entire background. (NOTE: the reason that I used acetate snowflakes is because Shimmerz cleans up really easily. I just wiped them off with a piece of paper towel. )
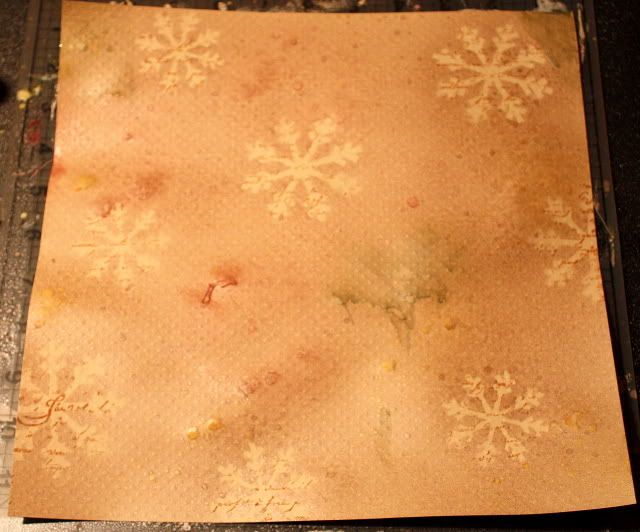
When I removed the snowflakes, this is the result. I used my heat gun to dry the background. Shimmerz normally dries really evenly, but I found that by concentrating a heat gun over the larger drops, gives you the splattered look.
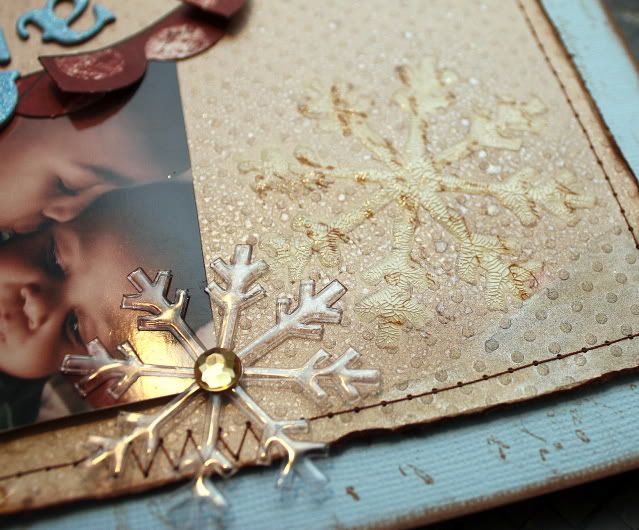
Here's a close-up of the snowflake. At this point, you can highlight your snowflakes, if you chose, with a pen, hand stitching, stickles, etc... I chose to to use Ranger's crackle accents and I just love the added texture it creates. The crackling also adds to the vintage feel of the layout as well!
The acetate snowflake seen here is one of the same ones I spritzed over. Just a little wipe and the spritz is gone...easy peasey!
I loved creating this technique; but to tell the truth, when I do it again, I'm going to use a shape with a little less detail, like a circle or something. The snowflakes were a little tedious, however, I did get a second use out of them.
All of the snowflakes that I carefully cut from the paper (in step 1 of the technique) were used on this next layout. I lightly spritzed them with seafoam, treasured hymn, and mudpie Shimmerz spritz and then stamped with the same french script stamp (one of my faves).

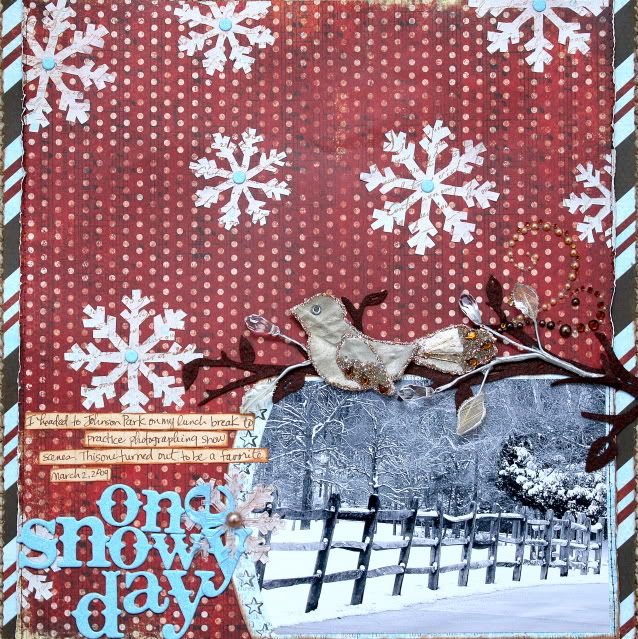
here's a close-up of a snowflake

I hope this post has inspired you to head out and grab some Shimmerz! There's no right or wrong way to use them!!!


Monday, November 23, 2009

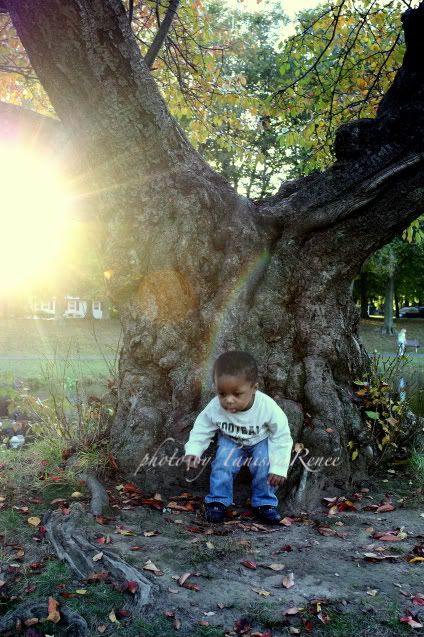
I Heart Faces Week 46

This week's topic over at
is sun flare!
Here's my take on it the challenge I took this photo of Xander at the park last month---he was a little uncooperative...LOL!

Saturday, November 21, 2009

In Bloom by My Little Shoebox

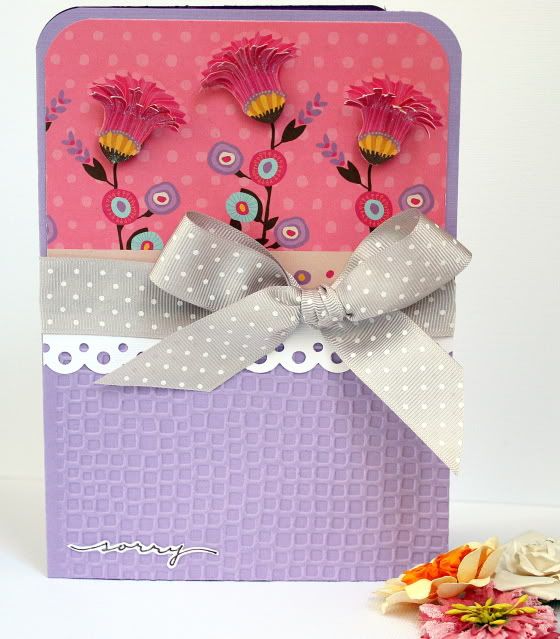
The In Bloom line by My Little Shoebox is one of the prettiest, most feminine papers I've come across lately. When I received my shipment in the mail the first thing I thought was, man this pretty and how in the world am I going to incorporate these papers into pages about boys? So I challenged myself, which you will see later in this post.

First up is a "Sorry" Card. I used an embossing folder and my Epic Six to deboss (I just flipped the embossing folder) the bottom of the card. I layered the flowers, the flower tops were cut into strips first and then painted with pixie dust blingz. I wrote the sentiment, then cut it out and painted it with pixie dust blingz as well.

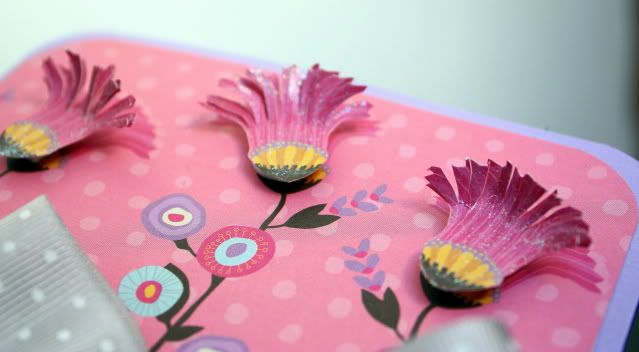
here's a close-up of the flowers

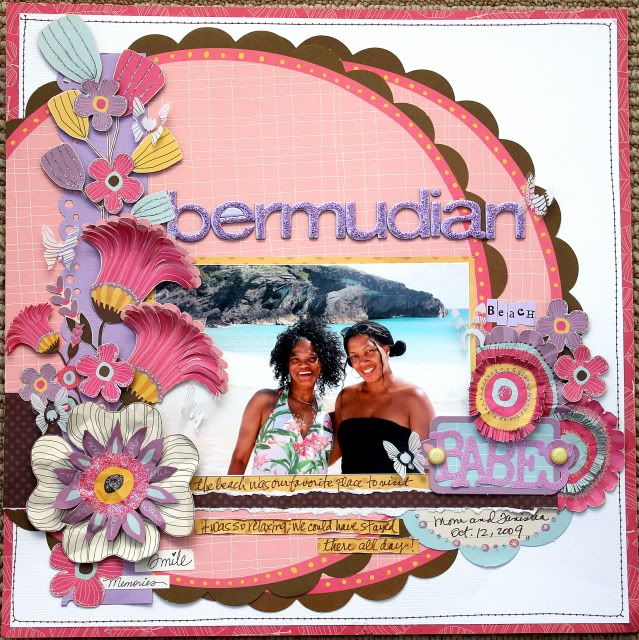
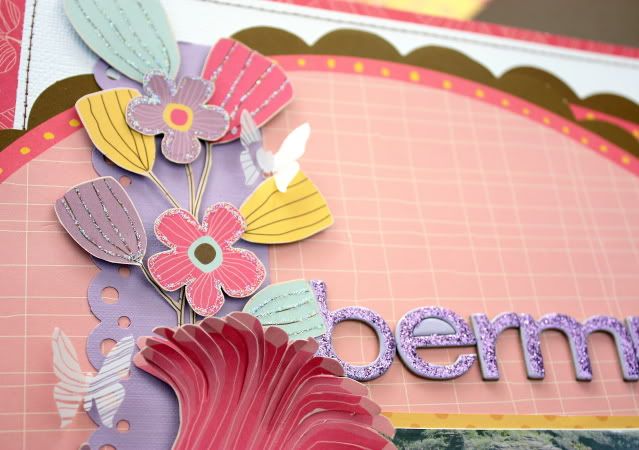
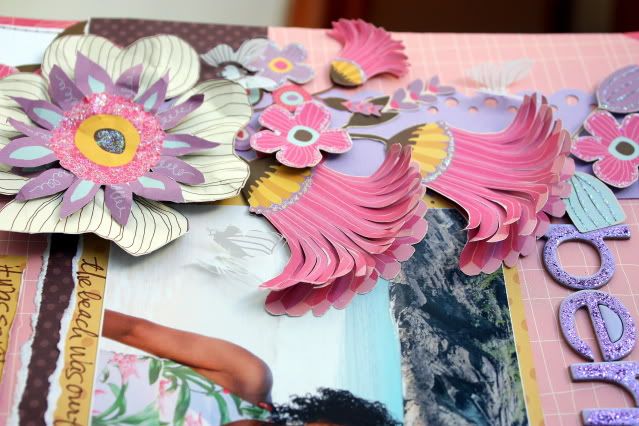
This next layout is one of my latest favorites!! This is a photo of my mom and I taken last month in Bermuda. I went super duper girly on this one and I love it! I think my mom (who has since been converted into a scrapper) will, too!
I used this layout that I created over 2 years ago as inspiration for this one.

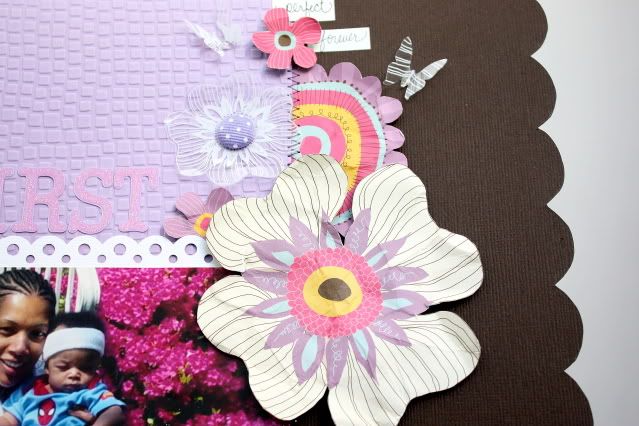
I got a little creative with the transparent overlay. Instead of cutting out the images, I used my butterfly punch and the results are beautiful little one-of-a-kind embellishments for my page.

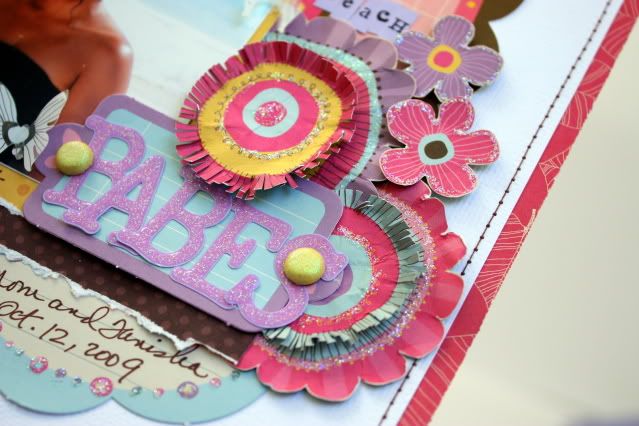
There was a lot of hand cutting going on for this page! My cutter bees got quite the work-out! So did my stickles! I crumpled most of the flowers and layered them using pop dots for added dimension. I also cut fringes in some of the flowers for that extra "touch me" appeal.

I really love these glazed alpha (see the word "babes"). They are an ingenious little invention that add the look of glitter without all of the mess.


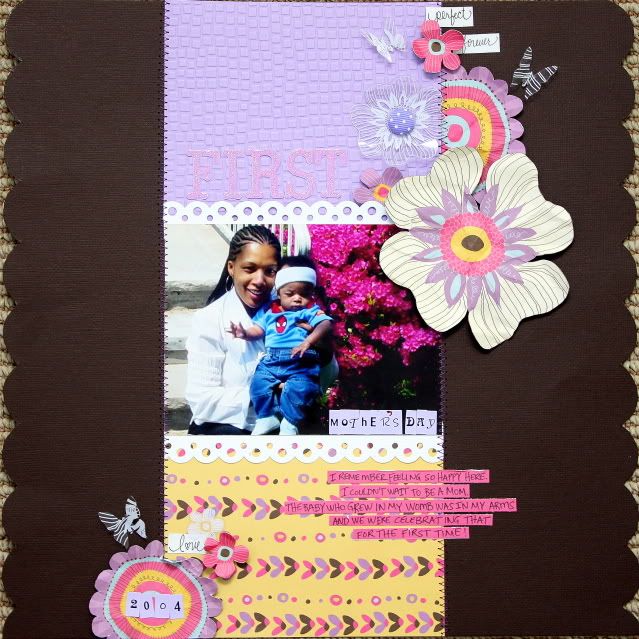
The photo on this next layout is so close to my heart. Troy took this picture of Donovan and I on my very first Mother's Day. Donovan was about 3 1/2 months old in this picture. I remembered feeling so happy that day. I couldn't wait to become a mom!
I must have been in an embossing state of mind because I used it here, too. Hand cutting, stitching, scalloped borders give this layout all right finishing touches. One of the elements about My Little Shoebox papers that I love most, is the fact the there are always images large enough to cut out and make into personalized embellishments.
Here you can get a closer look at the butterflies that I punched from the overlay, the scalloped edges and the hand cut flowers.

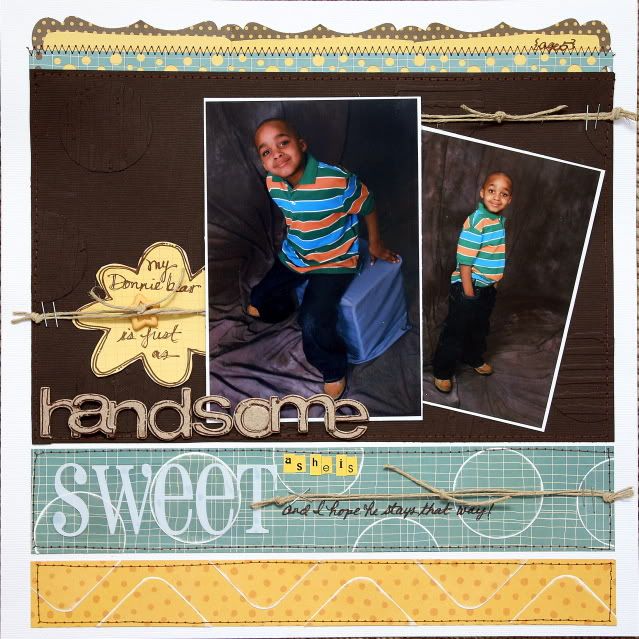
To create this next layout, I took on a dual challenge. Suzy challenged the DT to scraplift one of DT member's, Michelle L.'s layouts seen here. Instead of actually scraplifting the layout, I took some elements from Michelle's layout titled "Oh So Happy" and used it to create my own version. I loved her color blocking and stitching and how the white background made the elements pop--these are the elements that I incorporated here.
I also challenged myself to create a masculine layout using this uber feminine line. I didn't want to use pink or lavender, nor flowers of any type. Sounds hard right? It was my way of showing MLS consumers how versatile these papers can be, even if you don't think so at first sight.
So how did I do?
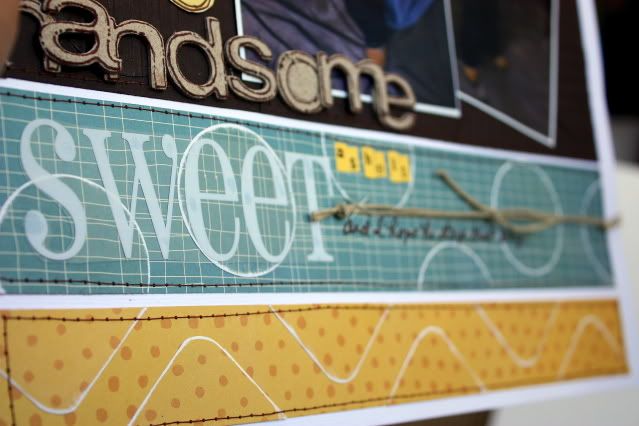
I took the blue and yellow patterned papers and cut strips from them. Since I was only working with 2 of the 6 different papers in this line, I had to really put on my thinking cap. I decided to add lots of texture! I cut shapes from the patterned papers and sanded around the edged before adhering them to my strips.
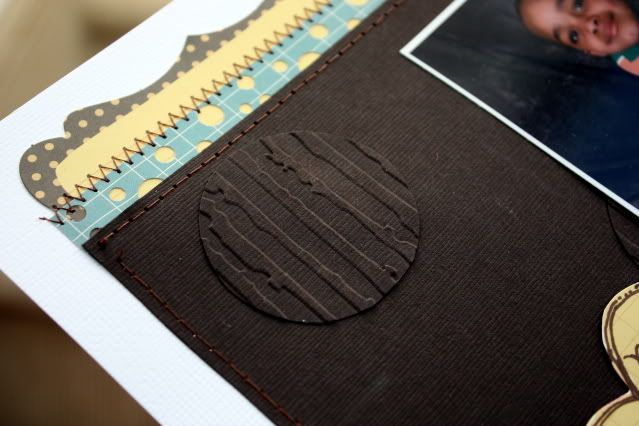
I did something similar to the brown cardstock. Instead of sanding the circles, I ran them through my embossing machine and then adhered them to the cardstock. I love the added texture!
I cut the artisan die cuts in half and layered them across the top. I used a border punch on the small blue strip to make it look like a blue/yellow piece of patterned paper and then stitched it across the edge.
I used twine to create a visual triangle and add texture. The chipboard letters were originally lavender, but that didn't present a problem. I just peeled off the top layer (one of the great things about chipboard) to reveal the raw texture and outlined them.
Looking at the previous 3 projects, one would never guess that this project was created from the same line!
here's a close-up of the textured tone on tone circles

...and a close-up of the chipboard, originally lavender as well as the sanded tone on tone shapes.

I hope you've enjoyed this LONG post and possibly learned something new!
Take care!
Don't forget to check out Purple Cows contest. There are still about 5 weeks left to enter! For more information check out this post! There are $9000 in prizes up for grabs!!!
I have another RAK winner to announce! Rachaelwood...you've won the My Little Shoebox Little Lady line!!! Congratulations and thanks for your support in the Purple Cows Contest!!!
email me your addy and I will get your RAK out to you!

Friday, November 20, 2009

Recent Projects And A TOOT!

Before I get to the projects, I just have to pause to say I am doing the happy dance!!! Woohoo!! Wanna know why? 'Cause I just found out that I made Buzz and Bloom's 2010 design team!!!! I know I used this word a lot, but I am so EXCITED!!! Click here if you want to see the announcement and get to know the other lucky ladies!

OK, now that I've gotten that out of my system, I can show you some of my recent projects. (I have more to come this weekend).

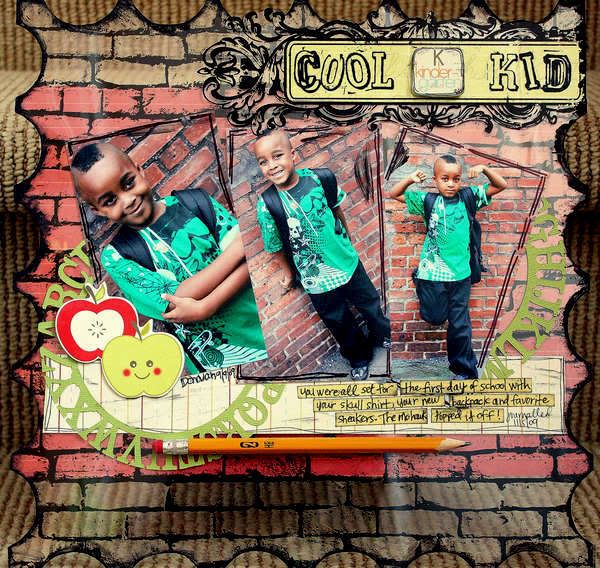
This week, it was my turn to guest blog for Purple Cows. I created the following layout using partner product from Imaginisce, Hambly, Clear Scraps, Clearsnaps, along with Purple Cows Ultimate Trimmer II.

I really love how this turned out--the background is the perfect match for the photos. I've had a couple of crafters ask me how I created the background. I simply incorporated one of my favorite techniques when it comes to working with acrylic. I like to mount some of the papers to the back of the acrylic and the photos, embellishments and smaller pieces of paper to the front. I think this process helps to create depth as if you were creating with just paper.

I added black acrylic paint to the edges to give the layout a strong sense of definition and helps drive the "grungy" look home. I just had to add the little apples because although my Donnie is standing against a brick wall, rockin' a mohawk and a skull short, I can't help but notice his sweet smile...which looks a little like the apple! LOL!

I bought the die cut from the Scrappy Shack.

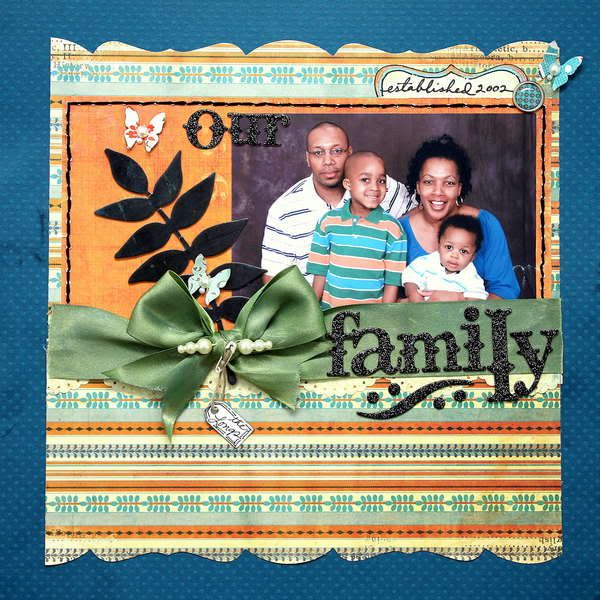
I went digging through my Pink Paislee stash again to come up with the perfect papers for my family photo. The ribbon here was originally yellow, but I used Shimmerz Spritz to change the color. I'm actually thinking about finding a 12x12 shadow box so I can hang this up. This was one of my favorite pictures from our family photo shoot!

I created this next layout for the new Dream Girls challenge.

Prompt: "List It!" Use a 1-10 list on your layout, could be your favourite films, or reasons you love someone, or ten facts...

Technique: "Clearly yours" - using a clear scrapping element - like punched overlay etc...

Product: "Mix It Up" Mix up alphabets - use multi alpha stickers/ dies/ fonts etc etc

remember taking this photo like it was yesterday...but alas, it was 3 years ago! My friends and I were going out one night during our girl's getaway weekend. I decided to break out in this booty twisting and shaking dance and my friend Yvonne decided to take pictures! Being as goofy as I am, she caught me in the middle of a gut wrenching laugh! Well at least I can laugh at myself...right?!

Thanks for taking a peek!

Wednesday, November 18, 2009

Flash Back

I've found myself often revisiting the past here lately. I've added the little "link within" widget to my blog, which has allowed me to go back and check out some of my older blog posts that I had forgotten about. I've even scrolled way back to the beginning of my online gallery at scrapbook.com to check out some of the scrapbooking layouts that I did years ago. Oooh, I was really infatuated with the doodling phase back in 2006...I'll have to share those layouts another time...maybe even scraplift some ideas. These little trips down memory lane were fun, but you know what I discovered? I was a much better writer back then...well at least better at communicating my thoughts, since I don't think of myself as a writer.

My scrapbooking pages had more meaningful and thoughtful journaling, my blog posts had more details about the things going on in my life and I had to stop and wonder...what happened? Has life become so busy that now I just scrawl down the basics? Am I more into product usage and the artistic expression of scrapbooking now than I was back then. I can't quite put my finger on it, but there certainly has been a shift.

You know, I often hear people make jokes about having more than one child. They say the first child has all of the photos and the more children you have, the less photos you take of the younger ones...well such is certainly not the case with my boys (Xander has a katrillion pictures...yes I made that word up...you now how I do). I can, however say that Donovan's scrapbook pages, although simpler is design (I cringe at some of the really early ones), contain more emotional value.

Here's a prime example...I took this picture of the 2 of us sitting in front of our home back in November 2005. I scrapped this page sometime in early 2006; although it's different than the way I scrap now, I like it because the photo is the main focus and ties in really well with the journaling.

journaling reads: One of these days you will be too big for me to hold you on my lap and comfort you like this. One of these days you will realize that it takes more than a hug and kiss to take the pain away. I'm glad today is not that day. One of these days, my hugs and kisses may embarrass you in front of your friends and you may not want them as often as you need them now, but I'm certainly glad today is not that day. One of these days, you will grow up to be a strong man with a family of your own and you will understand the value of spending moments like this. I'm glad today is not that day. Today is the day that I get to sit in front of our home, on a warm autumn day, and comfort my son. Today is the day that I get to give you all the hugs and kisses that you could ever want or need. I know the day will come when you will grow up to become an independent adult, but I must say I am so glad that today is not that day.

Reading this now makes me want to cry and I wrote it 3 years ago! I want this blog post to serve as my little reminder... I started this blog because I wanted to share my scrapbook layouts and in essence, my photos...my family...and my life. I started scrapbooking (in 2005) because I wanted to RECORD memories and I wanted my children to have something to REMEMBER me by if something happened to me. So although yes, I am more into the art of scrapbooking, I just have to remember to incorporate my HE{ART} into scrapbooking. I'm definitely going to use this layout as a guide to creating a similar one for my Xander. Looking over what I have created for him already, definitely shows how much he is loved...but I want for him, something with more depth and thought. Know what I mean?


Anyway, thanks for listening to me blabber... have a great one!

Tuesday, November 17, 2009

Shimmerz DT Call

ATTENTION!!! Shimmerz Paints is having a Design Team Call!

Shimmerz is a cutting edge manufacturer, and looking for individuals who are not afraid to think outside of the box. Get Messy! Shimmerz is looking for artists and designers who can create a variety of projects such as layouts, cards, altered art, and whatever else you can do!

Design Team Responsibilities:
3 required projects each month, posted on your personal blog and the Shimmerz blog. More is great! One must be Shimmerz specific.

1 tutorial with photos during your Design Team tenure.

Willing to promote Shimmerz on blogs, forums, Facebook, and anywhere else possible.

We are looking for Team Players!

Benefits:

Name and blog link added to the Shimmerz blog.

A Design Team kit to start creating Amazing projects.Publication Incentives.

A Design Team Discount

New Product Releases!

Chance to be part of a Wonderful Design Team!

What To Send:

Submit 2-3 projects (Does not have to feature Shimmerz, but we want to see the sparkle and shine); Good Photography is a MUST!

Name and Contact Information.

Blog Address.

Previous Design Team Experience and/or Publications.

A few sentences on why you want to be a part of Shimmerz.

If interested in being a part of Shimmerz, please apply by emailing photos of your projects, and other information to mcelyea@q.com by December 28, 2009. The new Design Team will be announced on January 1, 2010.

Blog: shimmerzpaints.blogspot.com

Website: shimmerzpaints.com

Email: mcelyea@q.com

Monday, November 16, 2009

Gift Card Holder From Start To Finish

Hey there, it's Tanisha here! I created this Shimmery project for the Holiday Bazaar at Serendipity Scrapbooks that I participated in this weekend. I totally adore Shimmerz and literally use it on nearly every one of my projects! I wanted to show you how easy it is to use Shimmerz products, so here are step by step instructions for a few quick techniques that you could incorporate into your projects to help take them over the top!

It may look like it takes a long time to recreate the look, but trust me, it doesn't. Shimmerz dries very quickly!

I started by scoring and folding a 4 1/2 x 12 cardstock to create the 4 1/2 x 6" card base.

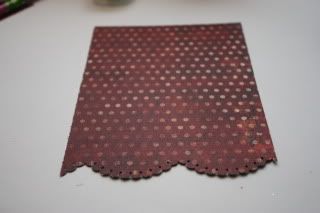
Next I used the border punch to create a scalloped edge on the bottom of a 4 1/4 x 5 3/4 piece of patterned paper and set aside.

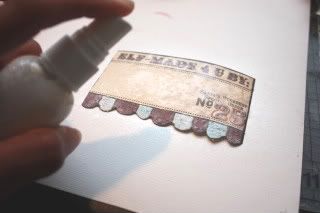
I spritzed a die cut with Baby's Breath Shimmerz and dried with the heat gun and set aside.

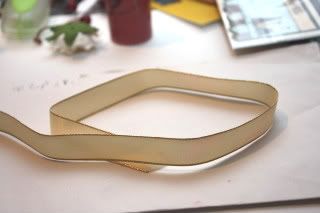
I then took my ribbon, originally cream, and placed it on my work surface.

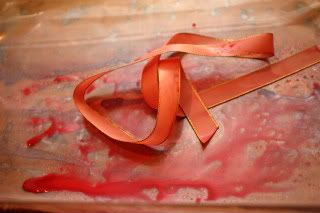
Next, I saturated it with Barn Door Shimmerz Spritz. Don't worry about getting messy, Shimmerz cleans up easily with soap and water!

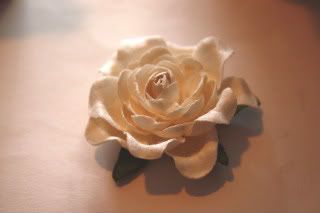
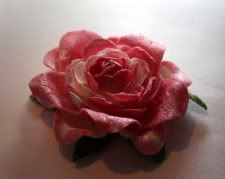
I took a Prima rose, originally white...

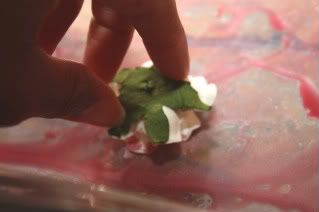
and rubbed it in the over spray on my work surface.

I could have easily sprayed the flower, but by rubbing it, I still maintain some of the original white in between the petals.

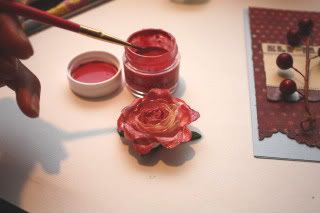
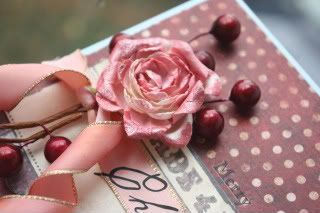
I took a thin paint brush and painted Ruby Red Shimmerz on some of the petals. I think the different tones of color really add dimension to the flower.

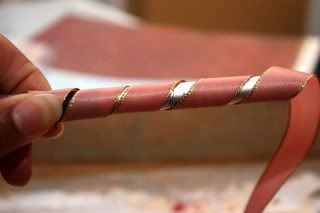
I then took my ribbon, which is still wet and wrapped one end around the handle of my craft knife (a pencil or similar tool would work, too). To create the ribbon curls, I used the heat gun to dry it in this position. Watch out for your fingers because the heat gun gets hot!!! (make sure to move the heat gun back and forth frequently so it doesn't scorch the ribbon). Repeat on the other end.

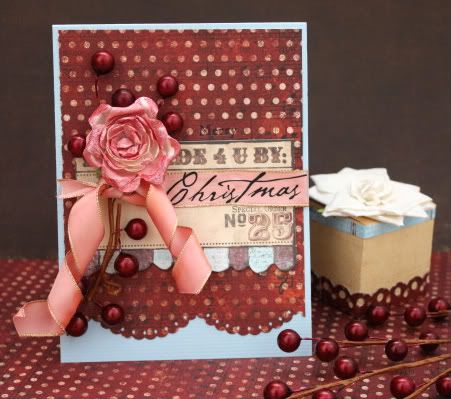
Now that all of the elements are dry, everything comes together pretty fast. I adhered the pattern paper to the cardstock. I ended up cutting a little more off the top so a larger portion of blue could show at the bottom. I centered the die cut and adhered it 2 1/8" from the top of the card. I used glue dots to adhere the holly berries to the left side of the card and then added the curled ribbon. I removed the green leaves from the flower and then adhered it above the knot in the ribbon. I added the rub-on sentiment and here's the result...

Here's a close-up of the flower...you can really see the shimmerz!

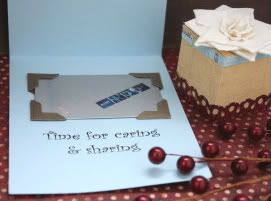
Here's what the inside looks like. I used 4 photo corners to hold the gift card in place and then added another rub on sentiment.


I hope you enjoyed the tutorial!

Thursday, November 12, 2009

So Flippin' Thrilled

OK, so the other day, I posted some Pink Paislee projects that I created and then I did my normal posting rounds to online galleries and social networking sites. When I tweeted my blog post, I included @PinkPaislee in the tweet ('cause of course I follow them on Twitter to get all the latest and greatest news) and guess what...I was asked if one of my projects could be shared!!!! Talk about floored and excited! So I went the site late last night to post this new layout (see below) and check out what I found on the blog...my layout, with some pretty awesome and blush causing compliments! This so completely made my week!! Awww yeah baby, I'm doing the happy dance all up in here!!

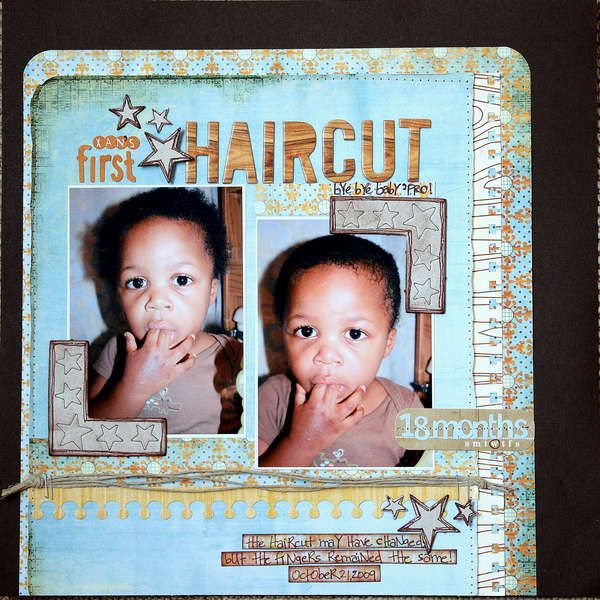
Check out my little man in these photos! We recently cut his hair for the first time and I think he looks super cute! When we first cut it, I almost cried...but I've gotten over it now...as a matter of fact, he's due for another trim, soon!

I mixed papers from Captivating, Enchanting and Office Lingo here. I think the raw Rusty Pickle chipboard and twine were just the perfect "boyish" elements I was looking for for this layout. Those wood grain chipboard letters from Cosmo Cricket really brought out the colors in the paper.


Thanks so much for taking a peek!!

Blog Widget by LinkWithin

My photo
I live in New Jersey with my husband and our 2 sons. I work full time as a Medical Technologist and volunteer for the Community Emergency Response Team in my town. I've been scrapping for the past 8 years and I truly love it because it allows me to combine my love of photography and my love of paper into one art form. I love teaching scrapbook classes and providing freelance work. Please contact me via email if you are interested in commissioning my services: tanisharenee74@hotmail.com

All content, including text, photographs, and artwork are copyright 2011 by Tanisha R. Long (except where noted). My original artwork is shared for personal inspiration only, not for commercial use. This includes contests, submissions, and publications. Any other use requires my expressed written consent.
MyFreeCopyright.com Registered & Protected

My Favorite Projects

Twitter


FEEDJIT Live Traffic Feed

Blog Archive

Labels